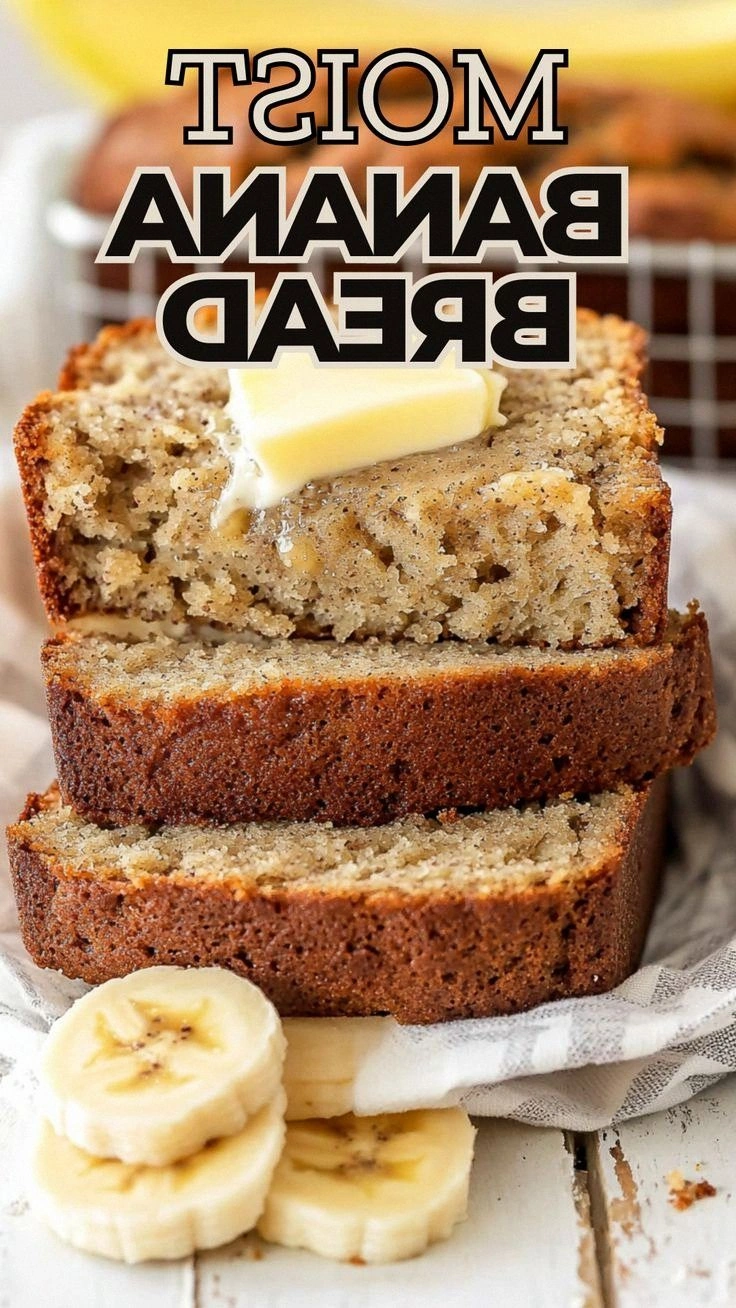
I was standing in a kitchen that smelled like burnt toast and old coffee, feeling the sting of a banana bread that had gone soggy and flat. That night, a friend dared me to make a loaf that would make the entire neighborhood line up for a slice. I laughed, but my stomach told me it was time to stop the banana bread apocalypse. The next morning, I woke up to the intoxicating aroma of ripe bananas, butter, and vanilla dancing in the air, promising a crumb that would sing with every bite. This is not just another loaf; it is the kind of bread that makes you question every other banana bread you’ve ever tasted. I’m about to walk you through a recipe that turns simple pantry staples into a moist, buttery masterpiece, and trust me, it’s hands down the best version you’ll ever make at home. Let me walk you through every single step — by the end, you’ll wonder how you ever made it any other way.
Picture yourself pulling this out of the oven, the whole kitchen smelling incredible, and the first slice sending a wave of buttery sweetness across your taste buds. The crumb is airy yet dense, a perfect balance of softness and structure that feels like a gentle hug from an old friend. I dare you to taste this and not go back for seconds, because once you do, there’s no going back to anything else. Most recipes get this completely wrong, but here’s what actually works: a precise ratio of bananas to flour, a splash of sour cream for moisture, and a subtle crackle on the crust that feels like a promise of flavor. If you’ve ever struggled with banana bread that turns out dry or too dense, you’re not alone — and I’ve got the fix. I’ll be honest — I ate half the batch before anyone else got to try it, and my kitchen still smells like banana bliss.
The secret sauce is a simple yet powerful technique that ensures every bite is as moist as the last. I’ll show you how to mash bananas to the right consistency, how to fold in wet and dry ingredients without overmixing, and how to bake at the perfect temperature so the edges set before the center overbakes. This isn’t just a recipe; it’s a masterclass in banana bread alchemy. The result is a loaf that looks like it was baked by a wizard, but the magic is all in the method, not in fancy ingredients. By the time you finish this post, you’ll have a foolproof recipe that you can confidently pull out of the oven, even if you’re a novice baker. And if you’re still skeptical, I challenge you to try it and see the difference for yourself.
Think of the first bite as a warm hug, the buttery crust cracking just enough to reveal a sweet, slightly tangy center. The banana flavor is unmistakable, but it’s never overpowering; it’s balanced by the subtle vanilla and the gentle lift from the baking soda. The texture is a revelation—soft, moist, yet firm enough to hold your knife without falling apart. If you’re looking for a dessert that also works as a comforting breakfast or snack, this loaf hits every mark. The best part? It’s incredibly forgiving, so even if you’re not a seasoned baker, you’ll still end up with something that tastes like a bakery staple. This recipe is a playground, and the variations we’ll cover later will make you feel like a culinary Picasso.
I’ve spent hours tweaking this loaf, swapping ingredients, and testing baking times until every element was perfect. The result is a banana bread that boasts a golden crust, a moist crumb, and a flavor profile that’s both nostalgic and fresh. The combination of sour cream and butter creates a moisture lock that keeps the bread from drying out, even when you slice it after a few hours. The bananas are mashed to a silky smoothness, which distributes the sweetness evenly throughout the loaf. The baking soda reacts with the acidity of the bananas and sour cream, giving the bread a lift that keeps it from feeling heavy. With each bite, you’ll taste the careful balance of sweet, buttery, and slightly tangy notes that make this loaf unforgettable.
I know the temptation to add extra mix-ins like nuts or chocolate chips can be strong, but this recipe is already packed with flavor. If you do decide to add extras, I’ll share how to do it without compromising the moistness and structure. The beauty of this loaf is its simplicity—just a handful of ingredients and a few straightforward steps. The result is a banana bread that will become the go-to recipe for every occasion, from a quick breakfast to a comforting dessert. I’ve already started planning a family gathering where this loaf will be the centerpiece, and I’m excited to see the smiles it will bring. So grab your mixing bowl, preheat the oven, and let’s dive into the world of banana bread perfection.
Before we get into the nitty-gritty, let’s take a moment to appreciate the humble banana. These fruit powerhouses are packed with potassium, fiber, and natural sweetness that makes them the star of any banana bread. They also contain a touch of natural acidity that reacts with the baking soda to give the loaf a light rise. By choosing ripe, overripe bananas, you’re not only ensuring maximum sweetness but also a richer flavor profile. The banana’s natural oils help keep the bread moist, which is why this recipe doesn’t need additional oils or fats beyond butter. When you taste the first slice, you’ll immediately notice the banana’s depth, a subtle note that lingers long after the last crumb. It’s the kind of flavor that turns an ordinary loaf into something memorable.
Now that we’ve set the stage, let’s break down what makes this banana bread stand out from the rest. The combination of ingredients, the precise method, and the thoughtful touches all work together to create a loaf that is both comforting and extraordinary. Whether you’re a seasoned baker or a kitchen newbie, this recipe will give you confidence and a delicious result. Let’s dive in and discover the secrets that make this loaf a must-try for every banana bread lover.
What Makes This Version Stand Out
- Moistness: The addition of sour cream locks in moisture, preventing the loaf from drying out even after a few hours. The butter provides richness while the bananas add natural hydration. Together, they create a crumb that feels like a cloud.
- Flavor Depth: The subtle tang from sour cream balances the natural sweetness of bananas, while vanilla adds aromatic warmth. This combination delivers a complex flavor profile that feels both nostalgic and fresh. The result is a loaf that satisfies sweet cravings without feeling cloying.
- Texture: A gentle lift from baking soda and a precise ratio of wet to dry ingredients produce a crumb that is airy yet firm enough to hold its shape. The crust forms a golden, slightly crisp exterior that contrasts beautifully with the soft interior. The loaf never feels gummy or crumbly.
- Simplicity: With only eight core ingredients, this recipe is easy to follow and forgiving for beginners. There are no complicated techniques or obscure ingredients, making it accessible to everyone. The steps are straightforward, yet the outcome is exceptional.
- Versatility: The recipe can be customized with optional mix-ins like walnuts or chocolate chips without compromising the moistness. It works as a breakfast, snack, or dessert, adapting to any occasion. The base can be tweaked to suit dietary preferences.
- Time Efficiency: Prep time is just 15 minutes, and the loaf bakes in 30 minutes, making it a quick yet rewarding project. The method is efficient, with no extra steps or long waiting periods. You’ll have a fresh loaf in under an hour.
- Crowd Appeal: Friends and family rave about the moist crumb and buttery crust. The loaf is a crowd-pleaser at gatherings, potlucks, or simply as a comforting treat. It’s the kind of bread that everyone asks for the recipe.
Inside the Ingredient List
The Flavor Base
All-Purpose Flour: The backbone of the loaf, providing structure and a neutral canvas for the other flavors. It’s essential to sift the flour to avoid lumps and to ensure a light crumb. If you prefer a healthier option, you can substitute half the flour with whole wheat, but keep the ratio of dry to wet ingredients in check.
Granulated Sugar: Adds sweetness and helps caramelize the crust for a golden finish. It also contributes to the moistness by drawing out moisture during baking. For a slightly healthier version, you can replace half the sugar with honey, but note that honey will alter the flavor profile.
The Texture Crew
Unsalted Butter: Melting the butter before adding it to the batter helps distribute fat evenly, ensuring a tender crumb. The butter’s rich flavor complements the bananas and creates that buttery crust you crave. If you’re watching calories, you can use half butter and half coconut oil for a lighter version.
Eggs: Serve as a binding agent, holding everything together while adding structure. They also contribute to the rise and give the loaf a subtle richness. If you’re vegan, try flax eggs (1 tbsp ground flaxseed + 3 tbsp water) as a suitable replacement.
Sour Cream: The key to the loaf’s moisture, sour cream adds a slight tang that balances the banana’s sweetness. It also tenderizes the crumb by breaking down gluten. If you don’t have sour cream, Greek yogurt works as a great substitute.
The Unexpected Star
Baking Soda: This leavening agent reacts with the acidity of the bananas and sour cream, giving the loaf a light rise. Too much baking soda can cause a soapy taste, so be precise. If you’re out of baking soda, baking powder can be used, but adjust the amount accordingly.
Vanilla Extract: Adds depth and a subtle aromatic warmth that enhances the banana flavor. A high-quality vanilla extract will make a noticeable difference. A dash of almond extract can be a fun twist if you want a different flavor profile.
The Final Flourish
Salt: Enhances all the flavors and balances the sweetness. A pinch of sea salt on top before baking gives a nice contrast to the buttery crust. If you’re on a low-sodium diet, reduce the amount slightly but don’t eliminate it completely.
Optional Mix-Ins: Chopped walnuts or pecans add a delightful crunch and nutty flavor, while chocolate chips introduce a sweet, indulgent twist. If you add mix-ins, fold them in gently after the batter is combined to avoid overmixing. These extras can transform the loaf into a personalized treat for any occasion.
Everything's prepped? Good. Let's get into the real action where the magic starts to happen.
The Method — Step by Step
- Preheat your oven to 350°F (175°C) and line a 9x5-inch loaf pan with parchment paper. Grease the paper lightly with a small amount of butter or cooking spray to ensure easy release. This step is crucial to prevent the loaf from sticking, which can ruin the appearance. I always set the timer for 10 minutes just to give myself a mental cue that the oven is warming up.
- In a medium bowl, whisk together the all-purpose flour, baking soda, and salt until fully blended. Sifting the dry ingredients not only removes clumps but also aerates the mixture, leading to a lighter crumb. This step might seem trivial, but it’s the foundation of a well-structured loaf.
- In a separate large bowl, beat the melted butter, sugar, and vanilla extract until the mixture is smooth and slightly glossy. The butter should be warm enough to mix easily but not hot. This creates a silky base that will carry the flavors of the bananas throughout the loaf. Kitchen Hack: For an extra glossy crust, brush the top of the batter with a thin layer of melted butter before baking.
- Gently fold in the mashed bananas, ensuring they are evenly distributed without overmixing. The bananas should be mashed to a smooth consistency with a few small lumps for texture. Overmixing can lead to a tough loaf because the gluten develops too much. Keep the batter loose and airy.
- Add the sour cream to the batter and fold until just combined. The sour cream’s acidity reacts with the baking soda, providing a light rise and a tender crumb. If you’re using Greek yogurt as a substitute, use the same amount and let the batter rest for 5 minutes to allow the flavors to meld.
- Fold in the dry ingredient mixture, stirring gently until no dry flour remains. The batter should look slightly lumpy but cohesive. This is the point where the loaf’s structure is set. Watch Out: Do not overmix at this stage; overmixing can cause the loaf to become dense and rubbery.
- If you’re adding nuts or chocolate chips, gently fold them in now. This ensures even distribution without clumping. The mix-ins should be added after the batter is almost ready to avoid them sinking to the bottom. This step adds a delightful surprise in every bite.
- Pour the batter into the prepared loaf pan, smoothing the top with a spatula. Tap the pan lightly on the counter to release any air pockets. This helps the loaf rise evenly and prevents uneven edges. The batter should fill the pan about 3/4 full.
- Bake for 30 minutes, or until a toothpick inserted into the center comes out clean or with just a few moist crumbs. The crust should be golden brown, and the loaf should emit a sweet, buttery aroma. Let the loaf cool in the pan for 10 minutes before transferring it to a wire rack to cool completely. This resting period allows the crumb to set properly.
That's it — you did it. But hold on, I've got a few more tricks that'll take this to another level. These insider tips will help you fine-tune the loaf and elevate its flavor profile even further.
Insider Tricks for Flawless Results
The Temperature Rule Nobody Follows
Many bakers bake banana bread at 375°F, but this recipe calls for a lower 350°F to prevent the crust from burning while keeping the center moist. The lower temperature allows the loaf to bake evenly, giving it a golden crust without overcooking the inside. If your oven runs hot, set it 25°F lower to compensate. The result is a loaf that’s tender inside and crisp outside.
Why Your Nose Knows Best
A simple trick: if the loaf smells like toasted sugar and butter, it’s ready. The aroma is a reliable indicator of doneness because the caramelization of the sugars signals that the crumb has set. I always keep a timer in the kitchen and rely on my nose to catch that sweet, buttery scent. It’s a sensory cue that no one else can replicate.
The 5-Minute Rest That Changes Everything
After removing the loaf from the oven, let it rest in the pan for 5 minutes before transferring it to a wire rack. This brief rest allows the steam to redistribute, preventing the bottom from becoming soggy. The crumb continues to set during this time, giving it a more cohesive texture. I’ve seen loaves that skip this step turn out slightly crumbly.
Adding a Splash of Espresso
A splash of espresso or strong coffee enhances the banana flavor without adding a coffee taste. The acidity of the espresso boosts the banana’s natural sweetness, creating a richer flavor profile. Add 1 tablespoon of espresso to the wet mixture before folding in the dry ingredients. This subtle tweak is a favorite among coffee lovers.
Using a Loaf Pan with a Lid
If you have a loaf pan with a lid, use it to trap steam and keep the loaf moist. The lid helps maintain a humid environment, preventing the top from drying out too quickly. Remove the lid in the last 10 minutes of baking to allow the crust to brown. This small adjustment can make a big difference in the final texture.
Cooling on a Wire Rack
Once the loaf has cooled in the pan, transfer it to a wire rack to finish cooling. The air circulation prevents condensation from forming on the bottom, keeping the crust crisp. I always let the loaf cool for at least 30 minutes before slicing, which ensures a clean, even cut. This simple step is often overlooked but is essential for a perfect crumb.
Creative Twists and Variations
Nutty Banana Bliss
Add 1 cup of chopped walnuts or pecans for a delightful crunch. The nuts pair beautifully with the banana’s sweetness and add a subtle earthy note. Toast the nuts before adding them for an extra layer of flavor. This variation is perfect for those who love a bit of texture in every bite.
Chocolate Chip Surprise
Fold in 1 cup of semisweet chocolate chips for a decadent twist. The chocolate adds a burst of richness that complements the banana’s natural flavor. Be sure to use a high-quality chocolate for the best taste. This version is a crowd-pleaser at parties.
Spiced Banana Wonder
Stir in 1/2 teaspoon each of cinnamon and nutmeg for a warm, aromatic loaf. The spices elevate the banana flavor and give the bread a cozy, holiday feel. Sprinkle a pinch of ground cloves for an extra kick. This variation is great for autumn gatherings.
Vegan Banana Bread
Replace the butter with coconut oil or vegan margarine and the eggs with flax eggs (1 tablespoon ground flaxseed + 3 tablespoons water). Use a plant-based yogurt in place of sour cream. This version maintains the moistness and flavor while being completely dairy and egg-free. It’s a great option for vegan diners.
Low-Carb Banana Delight
Swap all-purpose flour for almond flour and reduce the sugar to 1/2 cup. Add a pinch of xanthan gum to help bind the batter. The loaf will be denser but still moist and flavorful. This variation is ideal for keto or low-carb diets.
Caramelized Banana Crunch
Top the batter with a mixture of brown sugar and butter before baking. The sugar will caramelize, creating a sweet, crunchy topping. Sprinkle a pinch of sea salt to balance the sweetness. The result is a caramelized crust that’s simply irresistible.
Storing and Bringing It Back to Life
Fridge Storage
Wrap the cooled loaf tightly in plastic wrap or place it in an airtight container. It will stay fresh for up to 5 days in the refrigerator. The moisture from the banana helps preserve the crumb, preventing it from drying out. Store it at room temperature only for a day or two before refrigeration.
Freezer Friendly
Slice the loaf before freezing to make it easier to grab a single piece later. Wrap each slice in parchment paper, then place them in a freezer bag. The loaf can be stored in the freezer for up to 3 months. Thaw at room temperature for 30 minutes before serving.
Best Reheating Method
Reheat a slice in the microwave for 20-30 seconds, then finish it in a toaster oven at 350°F for 5 minutes to restore the crust. Alternatively, place the whole loaf in a preheated oven at 300°F for 15 minutes. Add a tiny splash of water to the bottom of the pan to create steam, which keeps the loaf moist. This trick ensures you get that fresh-baked feel every time.
Now that you’ve mastered the base recipe, consider experimenting with the variations we discussed earlier. Each tweak opens a new flavor dimension, making the loaf feel fresh every time you bake it. Whether you’re craving a nutty crunch or a chocolatey delight, the base remains the same, and the result is always a moist, buttery masterpiece. I’ve tried all these variations and can’t recommend them enough for any occasion. Keep this recipe in your repertoire, and you’ll always have a go-to comfort food that satisfies any craving. Happy baking!