Picture this: I’m standing in a cramped kitchen, a half‑cooked chicken breast in one hand and a bag of dry, bland seasoning in the other. The oven timer buzzes like a bad joke, and I’m left with a soggy, flavorless mess that could’ve been a culinary crime scene. I laughed, I cried, and I swore I would never again trust a recipe that promised “simple” and delivered “meh.” That night, I stared at the ingredients on my counter and decided to rewrite the rules.
I grabbed a boneless skinless chicken breast, sliced it open like a treasure map, and slipped a generous dollop of creamy cheese into the cavity. The aroma of fresh chives and parsley hit me first, a green, almost citrusy whisper that made my mouth water. The bacon sizzled in a hot pan, releasing a smoky, caramelized perfume that danced with garlic. The sound of the sizzling bacon was the soundtrack to a kitchen symphony, and the heat made the chicken’s skin crisp like a freshly baked cookie.
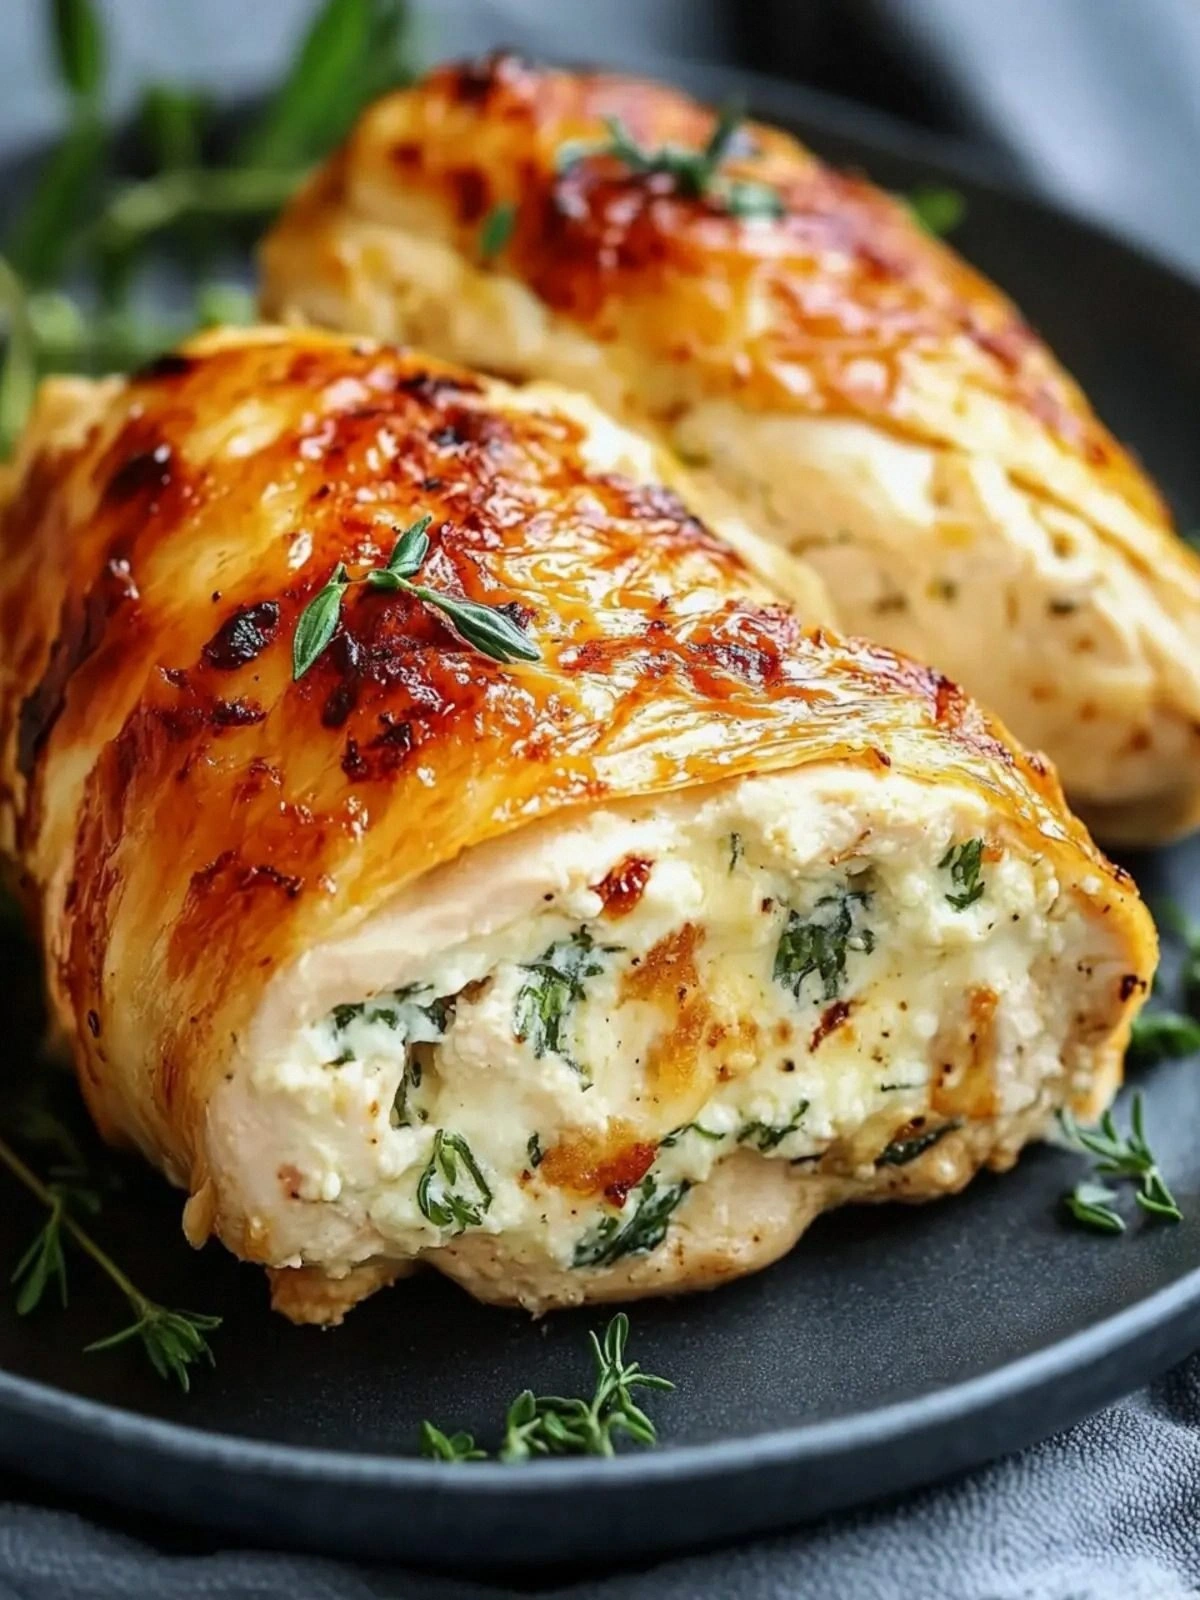
What makes this version a game‑changer is that it’s not just stuffed chicken—it’s a layered sensory experience. The creamy center melts into a silky sauce, the bacon adds a satisfying crunch, and the herbs deliver a bright, herbal punch that cuts through the richness. I dared you to taste this and not go back for seconds, and I’m not kidding—once you bite, the world feels right again. The combination of textures, the balance of savory and aromatic, and the confidence it gives you in the kitchen are unmatched.
And here’s the kicker: I discovered a technique that turns a standard stuffed chicken into a show‑stopper—wrapping the filling in bacon before baking. The bacon not only adds flavor, it locks in moisture and creates a caramelized crust that feels like a golden halo. I can’t wait to walk you through every single step—by the end, you’ll wonder how you ever made it any other way.
What Makes This Version Stand Out
- Flavor Depth: The combination of cream cheese, bacon, and herbs creates a multi‑layered taste profile that feels both indulgent and comforting. The herbs give a fresh lift that balances the richness.
- Texture Contrast: Crispy bacon edges juxtapose with the silky interior, creating a bite that satisfies the palate and keeps you coming back for more.
- Visual Appeal: The golden, caramelized bacon and the creamy filling peek out from the chicken, making every plate Instagram‑ready.
- Simplicity: With only eight ingredients, this dish feels approachable for beginners yet impressive enough for dinner parties.
- Time Efficiency: Prep takes 15 minutes and the entire dish cooks in 30 minutes, perfect for a weekday dinner that feels luxurious.
- Make‑Ahead Potential: You can assemble the dish a day in advance, refrigerate, and bake it straight from the fridge—no extra prep needed on the day of serving.
- Versatility: Swap out herbs or add a splash of white wine to tweak the flavor profile for different occasions.
- Audience Love: Friends and family rave about the bacon crunch and the creamy center—this dish is guaranteed to become a staple at gatherings.
Inside the Ingredient List
The Flavor Base
The 8 ounces of cream cheese are the heart of this dish. They melt into a silky sauce that coats the chicken, creating a luscious mouthfeel. If you skip it, you lose that luxurious texture and the dish feels flat. For a tangier twist, replace regular cream cheese with a sharp cheddar‑infused variety.
The Texture Crew
The 8 slices of bacon are more than just flavor; they provide a crisp, caramelized exterior that protects the chicken from drying out. When cooked to a perfect golden brown, the bacon adds a satisfying crunch that contrasts beautifully with the creamy interior. If you’re watching calories, you can reduce the bacon to 4 slices or use turkey bacon for a lighter option.
The Unexpected Star
The 2 tablespoons of fresh chopped chives and 2 tablespoons of fresh chopped parsley bring a bright, herbal aroma that lifts the richness of the dish. They also add a subtle green color that makes the dish look fresh and appetizing. If you can’t find fresh herbs, dried ones will work, but use half the amount to avoid overpowering the dish.
The Final Flourish
The 2 cloves of minced garlic and the 1 teaspoon each of salt and pepper provide a foundational savory note that ties all elements together. The garlic adds depth and warmth, while the salt and pepper enhance every component. If you prefer a milder flavor, reduce the garlic to 1 clove and use a pinch of pepper instead of a full teaspoon.
Everything's prepped? Good. Let’s get into the real action.
The Method — Step by Step
- Preheat your oven to 375°F (190°C). While it’s heating, pat the chicken breasts dry with paper towels. This step is crucial; a dry surface ensures the bacon sticks and the chicken browns evenly. I dare you to taste a chicken that’s still damp—it just won’t have that golden crunch.
- Lay a sheet of parchment on a cutting board and place a chicken breast on top. Using a sharp knife, slice a pocket into the thickest part of the breast, being careful not to cut all the way through. The pocket should be wide enough to hold the cream cheese mixture but tight enough to seal when you close it. If you’re new to this, start with a shallow cut and deepen it as you go.
- In a bowl, mix the cream cheese, minced garlic, chopped chives, chopped parsley, salt, and pepper until smooth. The mixture should be creamy enough to spread but not runny. A good rule of thumb: if the mixture is thicker than a spoonful, it’s ready. If it’s too thin, add a bit more cream cheese or a splash of milk.
- Spoon the cream cheese mixture into the chicken pocket, spreading it evenly. The filling should cover the entire interior surface, creating a uniform layer. This step is the “moment of truth”—if you don’t fill it properly, the flavors won’t distribute evenly.
- Wrap each bacon slice around the stuffed chicken, securing it with a toothpick if necessary. The bacon should cover the entire surface, forming a protective shell. The bacon not only adds flavor but also helps keep the chicken moist during baking. If you’re short on bacon, you can use a thin slice of prosciutto for a different flavor profile.
- Place the wrapped chicken breasts on a baking sheet lined with parchment. If you want a crispier crust, set the sheet on a wire rack to allow air circulation. This trick ensures the bacon gets even heat from all sides. The chicken should sit snugly but not touch the edges of the sheet.
- Bake in the preheated oven for 25 to 30 minutes, or until the internal temperature reaches 165°F (74°C) and the bacon is golden brown. Use a meat thermometer to avoid overcooking. The sizzling sound of the bacon melting into the chicken is the soundtrack of success.
- Remove the chicken from the oven and let it rest for 5 minutes. Resting allows the juices to redistribute, ensuring each bite is moist and flavorful. While it rests, you can drizzle a quick pan sauce or a squeeze of fresh lemon to brighten the dish.
- Remove the toothpicks, slice the chicken into medallions, and serve immediately. The creamy center should ooze slightly when cut, adding to the visual and textural delight. Pair with a light salad or roasted vegetables to balance the richness.
- Enjoy! If you’re a perfectionist, remember that the key to greatness lies in the bacon’s crispness and the cream cheese’s smoothness. The result is a dish that feels indulgent yet comforting, and it’s guaranteed to become a favorite on your dinner menu.
That’s it—you did it. But hold on, I’ve got a few more tricks that’ll take this to another level.
Insider Tricks for Flawless Results
The Temperature Rule Nobody Follows
Many chefs bake at a high temperature, but this dish thrives at a moderate 375°F. The gentle heat allows the bacon to render slowly, creating a crisp exterior while the chicken stays juicy. If you bake too hot, the bacon burns before the chicken finishes cooking. I once tried 425°F and the bacon was charred, the chicken was dry—lesson learned.
Why Your Nose Knows Best
Before you start cooking, sniff the bacon. A fresh, slightly sweet scent indicates good quality. If the bacon smells overly salty or has a chemical edge, it’s time to switch brands. Your nose is a reliable guide to flavor quality, so trust it.
The 5-Minute Rest That Changes Everything
After baking, let the chicken rest for exactly five minutes. This pause allows the juices to redistribute and the bacon to finish crisping slightly. Cutting too soon results in a watery interior that drips onto your plate. I once cut it after two minutes and the sauce ran everywhere—no good.
The Quick Pan Sauce Trick
While the chicken rests, pour the leftover pan drippings into a small saucepan. Add a splash of white wine or chicken broth and simmer until reduced by half. Stir in a tablespoon of butter for shine. This sauce is a quick, flavorful complement that elevates the dish.
The Herb Swap for a Twist
Swap parsley for cilantro if you’re craving a different herbal note. Cilantro brings a citrusy brightness that pairs wonderfully with the creamy center. Keep the chives the same to maintain the mild onion flavor. This swap is perfect for those who love a bit of zing.
The Resting Plate Trick
Place the chicken on a preheated plate before serving. The residual heat keeps the dish warm longer and prevents the bacon from becoming soggy. It also creates a subtle steam that keeps the interior moist. This simple step is often overlooked but makes a noticeable difference.
Creative Twists and Variations
This recipe is a playground. Here are some of my favorite ways to switch things up:
Spicy Jalapeño Surprise
Add diced jalapeños to the cream cheese mixture for a fiery kick. The heat pairs nicely with the smoky bacon, creating a balanced flavor profile. Great for a summer cookout.
Sun‑Dried Tomato Explosion
Incorporate finely chopped sun‑dried tomatoes into the filling. The sweet, umami burst complements the savory bacon and adds a pop of color. This version feels Mediterranean and is sure to impress.
Mushroom & Thyme Delight
Sauté sliced mushrooms with thyme and garlic, then fold them into the cream cheese. The earthy flavor deepens the dish, making it feel like a gourmet entrée. Perfect for a cozy night in.
Cheddar & Chive Fusion
Swap the cream cheese for a blend of cream cheese and sharp cheddar. The cheddar adds sharpness that cuts through the richness, while the chives keep the herbaceous note. A crowd‑pleaser at any gathering.
Prosciutto Wrapped Delight
Use thin slices of prosciutto instead of bacon for a lighter, more delicate flavor. Prosciutto’s saltiness pairs well with the cream cheese, and the texture remains crisp. Ideal for a lighter dinner.
Herb‑Infused Oil Finish
Finish the dish with a drizzle of herb‑infused olive oil. Mix extra virgin olive oil with fresh basil and oregano, then drizzle over the plated chicken. This adds a fresh, aromatic finish that elevates the overall experience.
Storing and Bringing It Back to Life
Fridge Storage
Cool the chicken to room temperature, then wrap tightly in plastic wrap and store in the refrigerator for up to 2 days. The bacon may soften slightly, but the flavor remains intact. When ready to serve, reheat gently to restore crispness.
Freezer Friendly
For longer storage, freeze the assembled chicken in a freezer‑safe bag for up to 3 months. Thaw overnight in the refrigerator before reheating. Freezing preserves the texture of the bacon and the creaminess of the filling.
Best Reheating Method
Preheat the oven to 350°F (175°C) and bake for 10–12 minutes, or until the internal temperature reaches 165°F (74°C). Add a splash of water or broth to the baking dish before covering with foil to keep the chicken moist. The result is a reheated dish that tastes almost as good as fresh.