I was in the middle of a midnight snack frenzy when the kitchen exploded into chaos. The pot of oatmeal I was about to pour over a bowl of yogurt had slipped, splashing everywhere, and I realized I was left with a ripe banana, a jar of cocoa powder, and a craving that demanded a quick, indulgent fix. That moment turned into an epiphany: why not turn that banana into a mug‑size chocolate cake that melts in your mouth? I dared myself to taste this and not go back for seconds, and the result was a velvety, fudgy bite that practically dissolved the stress of the night. The aroma alone—sweet banana, rich chocolate, a hint of vanilla—filled the kitchen with a promise of comfort.
Imagine the first bite: the cake is airy on the outside, yet a dense, chocolatey center that oozes like a molten river. The texture is a paradox—light as a cloud, but with a satisfying chew that lingers. The banana’s natural sweetness balances the slight bitterness of cocoa, creating a flavor profile that feels like a hug from the inside out. The splash of milk and oil gives it a silky finish that makes it feel like a dessert you can eat straight from the mug. It’s the kind of comfort food that makes you question whether you should be cooking at all.
What sets this version apart from the countless mug cake recipes you’ve seen on Pinterest is the meticulous layering of flavors and the use of simple, honest ingredients. I’ve replaced refined sugar with real banana sweetness, trimmed the flour to keep it airy, and added a touch of vanilla to elevate the chocolate without overpowering it. The secret is in the ratio: just enough cocoa to dominate, but not so much that it becomes a bitter after‑taste. The result is a cake that rises like a soufflé, yet stays perfectly moist and chocolatey inside. It’s the kind of indulgence that feels both indulgent and wholesome.
And there’s a twist you won’t expect: the addition of a pinch of baking powder that gives the batter a lift, and the final flourish of chocolate chips and nuts that add texture and a burst of flavor with each bite. Most recipes get this completely wrong by over‑baking or under‑seasoning, but here the batter is just the right consistency to steam in the mug. I dare you to taste this and not go back for seconds—trust me, you’ll be tempted to double the batch before you even finish the first one. Picture yourself pulling this out of the microwave, the whole kitchen smelling incredible, and the mug steaming with a sweet, chocolatey aroma that makes you smile. Okay, ready for the game‑changer? Let me walk you through every single step—by the end, you’ll wonder how you ever made it any other way.
What Makes This Version Stand Out
- Flavor Balance: The banana’s natural sweetness cuts through the deep cocoa, creating a harmony that feels both rich and approachable. The subtle vanilla lift prevents the chocolate from feeling heavy, while the milk softens the batter’s texture. The result is a cake that satisfies sweet cravings without the sugar crash. This balance makes it a standout dessert that feels indulgent yet healthy.
- Texture Mastery: The batter is light enough to rise like a souffle yet dense enough to hold the chocolate chips and nuts. The combination of milk and oil keeps the crumb moist, preventing the cake from drying out in the microwave. The final product has a chewy center and a crisp edge that shatters like thin ice when you bite into it. This duality is what turns a simple mug cake into a memorable treat.
- Simplicity: No fancy equipment or long prep time—just a handful of pantry staples and a mug. The recipe is perfect for those who want a quick dessert without a full kitchen setup. Even a beginner can follow along and produce a professional‑looking result. The fewer the steps, the higher the chance of success.
- Ingredient Quality: Using ripe banana instead of canned fruit ensures natural sweetness and a richer flavor. The cocoa powder is high‑quality, giving a deep chocolate note rather than a bitter aftertaste. The nuts add crunch and healthy fats, making the dessert both indulgent and balanced.
- Make‑Ahead Potential: The batter can be prepared in advance and stored in the fridge for up to 24 hours. When you’re ready to serve, simply microwave and watch the cake rise. This convenience is perfect for busy mornings or last‑minute dessert requests.
- Audience Appeal: The recipe is a crowd‑pleaser—children love the chocolate chips, adults appreciate the banana’s subtlety, and health‑conscious diners get a low‑calorie dessert with real fruit. It’s a versatile dish that fits into almost any dietary preference. The result is a dessert that feels special but is easy to make.
Inside the Ingredient List
The Flavor Base
The banana is the star of the show, providing natural sweetness and a subtle tropical note that balances the rich cocoa. Ripe bananas have a higher sugar content and a softer texture, which means they mash easily into a silky puree. If you use a green banana, the cake will be less sweet and more starchy, which might not pair as well with chocolate. For the best flavor, choose a banana that shows a golden‑brown rind and yields to gentle pressure.
The Texture Crew
All‑purpose flour keeps the cake light and airy, but using too much can make it dense. That’s why the recipe calls for only a quarter cup, which is equivalent to four tablespoons. Cocoa powder adds depth and a slight bitterness that balances the banana’s sweetness. Sugar, though only a quarter cup, sweetens the batter without overpowering the chocolate. The oil and milk create a moist crumb and help the cake steam properly in the mug.
The Unexpected Star
Baking powder, a mere 1/8 teaspoon, is the secret lift that gives the cake a gentle rise. It reacts with the acidic banana, producing carbon dioxide bubbles that expand during microwaving. A pinch of salt is essential to heighten the chocolate flavor and counteract the sweetness. Without salt, the chocolate would taste flat and the overall profile would feel unbalanced.
The Final Flourish
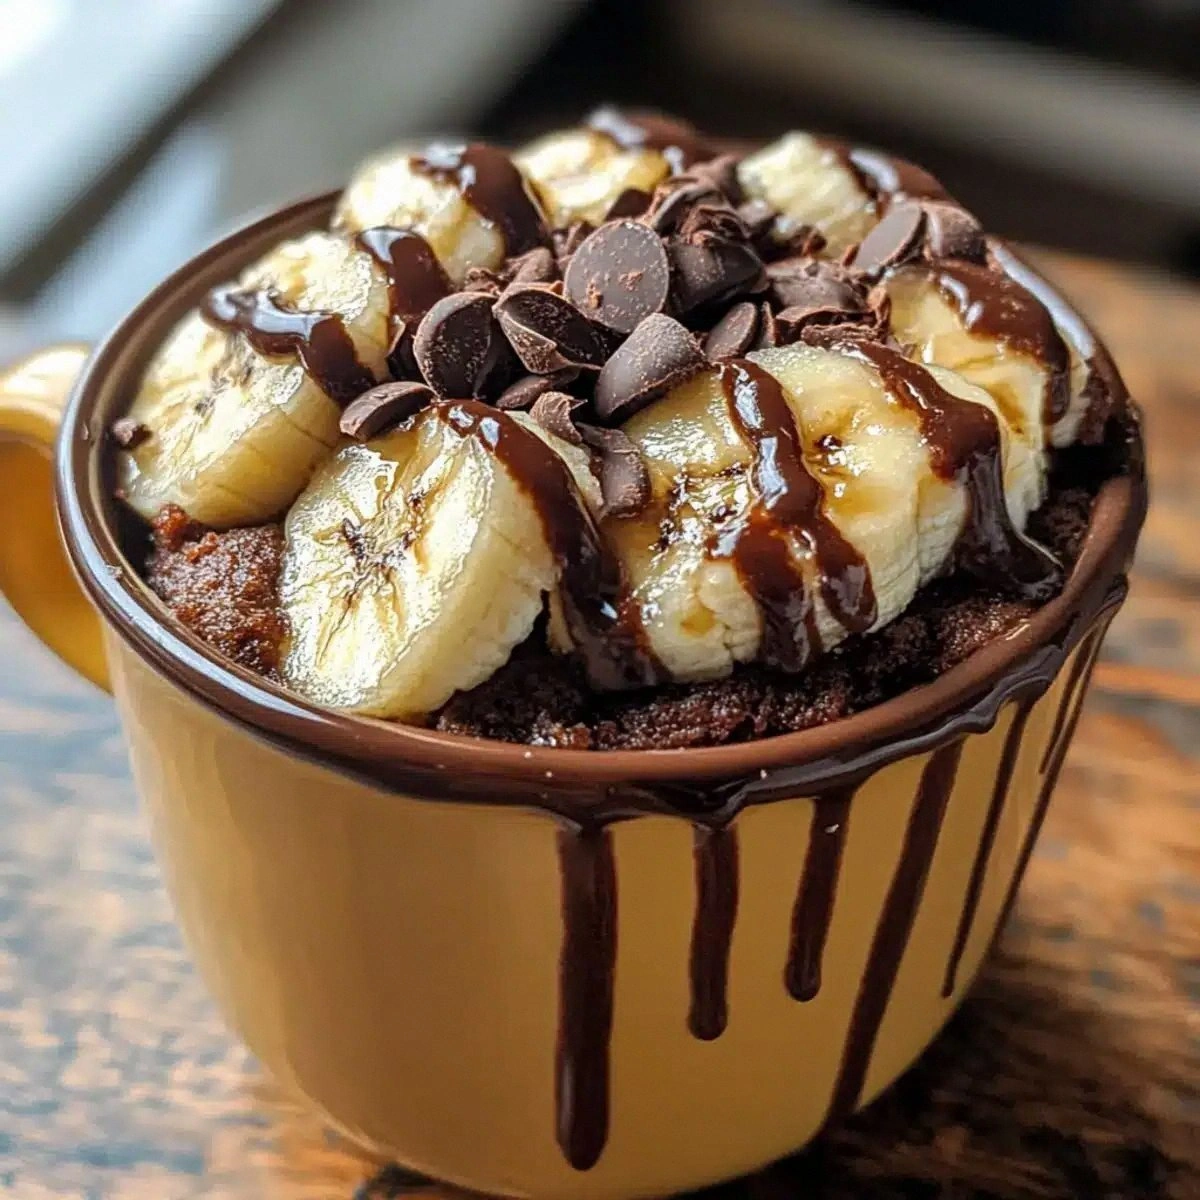
Chocolate chips add pockets of molten chocolate that melt into the cake as it cooks, creating an indulgent surprise with each bite. Chopped nuts provide crunch and a nutty aroma that complements the banana. Powdered sugar on top gives a delicate dusting that adds a touch of sweetness and a beautiful finish. Optional whipped cream or yogurt adds a creamy contrast and makes the dessert feel like a full‑blown treat.
Everything's prepped? Good. Let's get into the real action...
The Method — Step by Step
- Start by slicing the ripe banana into thin rounds and placing them in the bottom of a large, microwave‑safe mug. The banana slices will serve as the base layer, absorbing the moisture and adding a natural sweetness that permeates the entire cake. Make sure the mug is wide enough so the batter can rise without overflowing. This step is crucial for an even rise and a tender crumb.
- In a small bowl, whisk together the flour, cocoa powder, sugar, baking powder, and pinch of salt until the mixture is smooth. The dry ingredients need to be well combined to prevent pockets of flour that can cause a gritty texture. A fine sift is optional but helps create a silky batter. This dry blend is the backbone of the cake’s structure.
- Pour the milk and vegetable oil into the mug, then add the vanilla extract. Stir until the liquid is evenly distributed and the mixture starts to look glossy. The oil adds a silky mouthfeel, while the vanilla brightens the chocolate flavor. This liquid stage is where the batter becomes a cohesive unit ready for the banana.
- Gently fold in the mashed banana, chocolate chips, and chopped nuts. Use a spoon to fold until the banana is fully incorporated but still visible in small pockets. The chocolate chips will melt slightly during cooking, creating pockets of molten chocolate that will delight the palate. The nuts add crunch and a nutty aroma that complements the banana.
- Cover the mug with a microwave‑safe lid or a plate to trap steam and create a mini oven environment. Microwave on high for 90 seconds, then check the cake. The top should be set but still slightly jiggly in the center; if it’s too runny, add an extra 15‑second burst. Timing may vary depending on your microwave’s wattage, so keep an eye on it.
- Once the cake is done, let it rest in the mug for 2 minutes. During this time the steam will finish cooking the center, and the cake will set firmly. Avoid lifting the mug too soon, as the cake might collapse. This short rest is the secret to a perfect rise.
- Dust the top with powdered sugar, then add a dollop of whipped cream or a spoonful of yogurt if desired. The sweet powder creates a delicate finish, while the cream adds a silky contrast. Serve immediately for the best texture; the cake is at its peak when warm.
That's it — you did it. But hold on, I've got a few more tricks that'll take this to another level...
Insider Tricks for Flawless Results
The Temperature Rule Nobody Follows
Microwave ovens vary in power, and using the wrong setting can ruin the cake. Instead of guessing, start with 90 seconds and then add 10‑second increments if needed. This incremental approach ensures the cake rises evenly and prevents scorching on the edges. The key is to monitor the batter’s texture rather than relying on a clock.
Why Your Nose Knows Best
The aroma of chocolate and banana rising from the mug is a reliable indicator that the cake is cooking correctly. If the smell is faint, the batter may still be too wet. A strong, sweet scent means the cake is nearing completion. Trust your senses; the kitchen is your best judge.
The 5‑Minute Rest That Changes Everything
Letting the mug sit for five minutes after microwaving allows the steam to finish cooking the interior. During this rest, the cake’s structure sets, and the chocolate chips melt to a silky consistency. A quick rest also prevents the cake from collapsing when you lift the mug. This simple step is often overlooked but is essential for a perfect rise.
Using the Right Mug Size
A 12‑oz mug is ideal because it gives the batter enough room to rise without overflowing. If you use a smaller mug, the cake may spill or burn. A larger mug will produce a thinner cake that might dry out. Choosing the right container is as important as measuring the ingredients.
Keeping It Moist
If you find the cake is drying out, add a splash of milk or a tablespoon of yogurt before microwaving. These liquids help maintain moisture and create a tender crumb. Alternatively, cover the mug with a paper towel to trap steam and keep the cake from drying.
Creative Twists and Variations
This recipe is a playground. Here are some of my favorite ways to switch things up:
Chocolate‑Mint Delight
Add a teaspoon of peppermint extract to the batter for a refreshing twist. The mint pairs beautifully with chocolate, creating a dessert that feels like a candy bar. This variation is perfect for spring or summer afternoons. Serve with a scoop of vanilla ice cream for an extra indulgence.
Nutty Caramel Swirl
Swirl caramel sauce into the batter before microwaving for a sweet, buttery layer. Top with toasted pecans for added crunch. The caramel adds a rich, buttery flavor that complements the banana’s natural sweetness. This version is great for dessert parties.
Spiced Cinnamon Banana
Add 1/2 teaspoon of ground cinnamon to the dry mix for a warm, spicy note. Cinnamon enhances the banana’s flavor and adds depth to the chocolate. This version is especially comforting during the fall and winter months. Pair it with a drizzle of honey for extra sweetness.
Vegan Vibes
Replace the vegetable oil with coconut oil and the milk with almond milk for a vegan version. Use a plant‑based vanilla extract and a dairy‑free chocolate chip. The coconut oil adds a subtle tropical flavor that pairs well with banana. This variation is perfect for those following a plant‑based diet.
Almond‑Lemon Fusion
Add almond butter to the batter for a nutty, protein‑rich boost. Replace the vanilla with lemon zest for a bright, citrusy contrast. The lemon zest cuts through the sweetness, creating a balanced flavor profile. This version is great for brunch or a light dessert.
Guilt‑Free Decadence
Swap sugar for a natural sweetener like stevia or monk fruit. Use a sugar‑free chocolate chip to keep the calorie count low. This version still delivers the same mouth‑watering texture and flavor. Perfect for those watching their sugar intake.
Storing and Bringing It Back to Life
Fridge Storage
Store the batter in an airtight container in the fridge for up to 24 hours. When ready to serve, microwave for 90 seconds, then let it rest for 2 minutes. The chilled batter will rise quickly and maintain moisture. This is ideal for busy mornings or last‑minute dessert requests.
Freezer Friendly
Freeze the batter in a freezer‑safe mug or a small container for up to 3 months. Thaw overnight in the fridge, then microwave for 90 seconds. Freezing preserves the banana’s flavor and the chocolate’s richness. This method is perfect for meal prep or to have on hand for spontaneous cravings.
Best Reheating Method
The best way to revive a frozen or refrigerated mug cake is to microwave on medium power for 60 seconds, then switch to high for an additional 30 seconds. Adding a splash of milk before microwaving helps keep the cake moist and prevents it from drying out. The cake will steam to perfection, restoring its original texture.