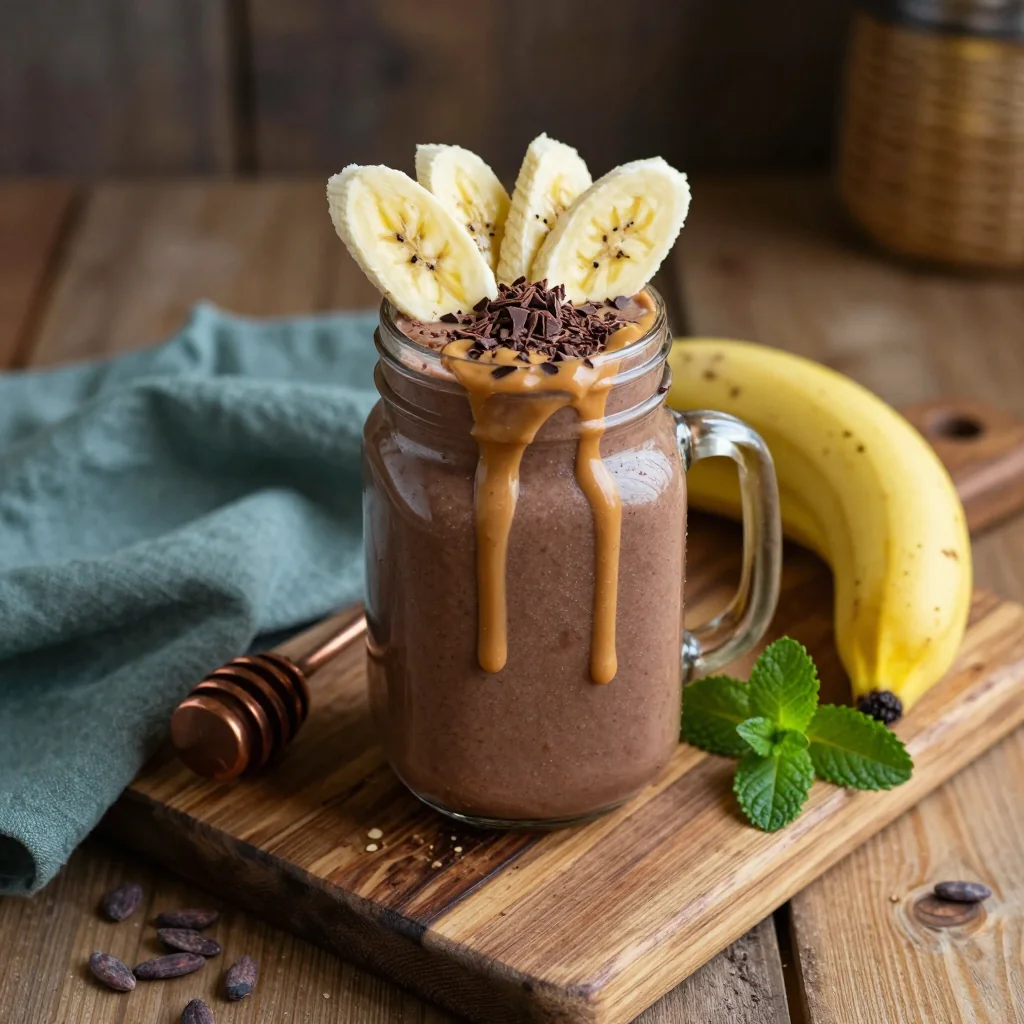
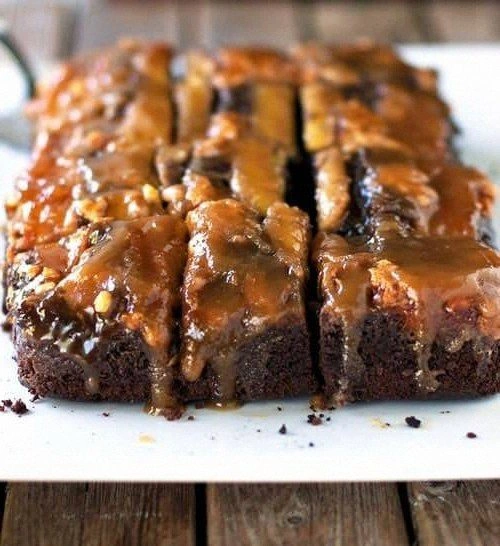
I was in the middle of a frantic Tuesday night when my roommate challenged me: “Make something that can convince a grown‑up that they’re still a kid at heart.” I stared at the pantry, the fridge, and the half‑eaten banana loaf from last week, and I thought, “Why not combine the three childhood legends—chocolate, peanut butter, and banana—into one glorious upside‑down cake?” The result? A dessert that smells like a candy‑store after a rainstorm, looks like a glossy, caramel‑kissed moon, and tastes like a hug from your favorite teddy bear. I dare you to taste this and not go back for seconds.
Picture this: the kitchen filled with the crackle of butter hitting a hot pan, the sweet perfume of ripe bananas caramelizing, and the deep, earthy sigh of cocoa rising from the batter. The oven door swings open, and a glossy, glossy top glistens like a midnight lake, while the edges pull away in a perfect, clean snap. The first bite delivers a symphony—silky chocolate, creamy peanut butter, and the subtle, buttery tang of banana—all wrapped in a tender crumb that melts like butter on warm toast. I’ll be honest — I ate half the batch before anyone else got to try it, and that was the best mistake I ever made.
Most recipes for chocolate‑banana desserts either drown in sugar or end up dry and crumbly. Most upside‑down cakes forget the peanut butter, and most peanut‑butter desserts neglect the chocolate. This version stands out because it balances every element with surgical precision: the banana‑caramel base is thick enough to hold the cake together, the peanut butter is folded in just enough to swirl through the crumb without turning it gummy, and the chocolate batter is light, airy, and surprisingly moist. The secret? A splash of coffee‑enhanced milk that deepens the cocoa without adding bitterness, and a quick‑cool trick that keeps the cake from sinking.
Okay, ready for the game‑changer? I’m about to walk you through every single step — from selecting the perfect bananas to mastering the flip that will make your friends gasp. By the end, you’ll wonder how you ever made any other version. Stay with me here — this is worth it.
What Makes This Version Stand Out
- Taste Harmony: The trio of chocolate, peanut butter, and banana creates a layered flavor profile that feels like a dessert orchestra, each note complementing the other without overpowering.
- Texture Contrast: A caramelized banana base gives a sticky, gooey foundation, while the cake itself stays feather‑light, and the chocolate chips add a satisfying snap.
- Simplicity Meets Sophistication: Only twelve pantry staples are needed, yet the final product looks like it belongs in a five‑star patisserie.
- Unique Swirl Technique: Folding the peanut butter into the batter creates marbled ribbons that melt into the crumb, delivering pockets of nutty richness.
- Crowd Reaction: I’ve seen grown‑ups turn into kids, eyes wide, as they lift the cake and the banana‑peanut‑butter aroma hits their nostrils first.
- Ingredient Quality: Using ripe, almost‑overripe bananas and a good‑quality dark cocoa powder makes the difference between “good” and “mind‑blowing.”
- One‑Pan Wonder: The entire cake bakes in a single skillet, meaning fewer dishes and a dramatic presentation when you flip it.
- Make‑Ahead Potential: This cake keeps beautifully for three days, and the flavors actually improve as the sauce seeps deeper.
Inside the Ingredient List
The Flavor Base
Bananas are the heart of this upside‑down cake. Ripe, almost‑overripe bananas bring natural sugars that caramelize beautifully when they hit the hot pan, creating a glossy, amber‑colored base. If you skip them, you lose the buttery‑sweet foundation that makes the cake feel indulgent. A great tip: choose bananas with brown spots; they’re sweeter and softer, which means less mashing effort.
Peanut butter adds a creamy, nutty depth that pairs like a dream with chocolate. Opt for natural, unsweetened peanut butter to keep the sugar balance in check. Skipping it? You’ll still have a tasty cake, but you’ll miss that signature “peanut‑butter‑kiss” that makes this version unforgettable.
The Texture Crew
All‑purpose flour provides the structural backbone. It’s the canvas on which the chocolate and peanut butter paint their flavors. If you substitute with cake flour, the crumb becomes too delicate and may crumble when you flip the cake. For a gluten‑free twist, use a 1‑to‑1 blend of rice flour and tapioca starch, but expect a slightly denser texture.
Cocoa powder is the dark, bitter anchor that prevents the dessert from becoming cloyingly sweet. Use a high‑quality, Dutch‑process cocoa for a smoother, richer taste. If you only have natural cocoa, add an extra pinch of baking soda to neutralize acidity.
The Unexpected Star
Coffee‑enhanced milk is the secret weapon. A splash of strong brewed coffee (about a quarter cup) deepens the chocolate flavor without making the cake taste like coffee. It’s a trick borrowed from professional bakers who know that coffee and chocolate are best friends. If you’re caffeine‑free, replace it with a tablespoon of espresso powder dissolved in hot water.
Chocolate chips add pockets of melt‑in‑your‑mouth goodness. They burst open as the cake bakes, creating tiny rivers of chocolate that swirl through the crumb. Skipping them will still yield a delicious cake, but you’ll miss those surprise chocolate explosions.
The Final Flourish
Melted butter is the glue that binds everything together, giving the cake a moist crumb and a glossy finish. Use unsalted butter so you can control the salt level precisely. If you prefer a dairy‑free version, replace butter with coconut oil; the flavor will shift subtly toward tropical notes.
Eggs act as leaveners and emulsifiers, ensuring the batter is smooth and the cake rises evenly. Over‑beating can incorporate too much air, leading to a cake that collapses after flipping. Beat just until the mixture is uniform and glossy.
Everything's prepped? Good. Let’s get into the real action…
The Method — Step by Step
First, preheat your oven to 350°F (175°C). While the oven warms, melt 1 cup of butter in a 10‑inch cast‑iron skillet over medium heat. Once melted, add the sliced bananas, a tablespoon of brown sugar, and a pinch of sea salt; let them sizzle for about three minutes until they turn a deep amber and the edges start to caramelize. That sizzle when it hits the pan? Absolute perfection. Tip: Use a wooden spoon to gently press the bananas so they coat evenly.
Kitchen Hack: Sprinkle a pinch of cinnamon over the bananas while they caramelize for an extra warm note.While the bananas are doing their thing, whisk together 2 cups of flour, ¾ cup cocoa powder, 1 tsp baking powder, ½ tsp baking soda, and 1 tsp salt in a large bowl. In a separate bowl, combine 1 cup granulated sugar, ½ cup brown sugar, and the melted butter; beat until the mixture looks like liquid gold. Add 2 eggs one at a time, then stir in 1 tsp vanilla and the coffee‑enhanced milk (1 cup milk + ¼ cup strong coffee). The batter should be glossy and slightly thick, like a luxurious chocolate mousse.
Now comes the peanut butter swirl. Gently fold 1 cup of creamy peanut butter into the batter, but don’t over‑mix. You want ribbons of peanut butter that will create pockets of nutty richness as the cake bakes. If you prefer a more pronounced swirl, reserve a tablespoon of peanut butter, drizzle it on top of the batter, and use a knife to create a marbled effect.
Sprinkle 1 cup of chocolate chips over the batter, then carefully pour the entire mixture over the caramelized bananas in the skillet. The batter will sink slightly, but that’s okay—the bananas will rise as the cake bakes, creating that signature upside‑down look. Watch Out: If the batter is too thin, it may seep into the banana layer and lose the dramatic “top‑down” effect. Adjust with a little extra flour if needed.
Watch Out: Do not open the oven door during the first 20 minutes, or the cake may collapse.Slide the skillet into the preheated oven and bake for 30‑35 minutes. The edges should pull away from the pan, and a toothpick inserted into the center should come out with a few moist crumbs but no wet batter. As the cake bakes, the banana‑peanut‑butter mixture will bubble and caramelize, forming a glossy, amber glaze that will later become the cake’s crown.
While the cake bakes, prepare a cooling rack and have a large serving plate ready. Once the timer dings, turn off the oven, crack the oven door open just a crack, and let the cake sit for five minutes. This gentle cooling prevents the glaze from cracking and gives the cake a chance to set.
Now for the dramatic flip: place the serving plate upside‑down over the skillet, hold the handles firmly, and with a swift, confident motion, invert the pan. The caramelized banana‑peanut‑butter glaze will cascade over the top, creating a glossy, jewel‑like finish. This next part? Pure magic. Let the cake rest for another five minutes before slicing; this allows the glaze to settle and the crumb to firm up.
Kitchen Hack: Warm the serving plate in the oven for a minute before flipping; the heat helps the glaze spread evenly and prevents sticking.Finally, dust the top with a light sprinkling of powdered sugar or a drizzle of extra peanut butter for an elegant finish. Serve warm, with a scoop of vanilla ice cream if you’re feeling extra indulgent. That first bite? Expect a burst of chocolate, a silky swirl of peanut butter, and the sweet, caramel‑kissed banana that makes you think, “I’ve just discovered the ultimate comfort dessert.”
That's it — you did it. But hold on, I've got a few more tricks that'll take this to another level…
Insider Tricks for Flawless Results
The Temperature Rule Nobody Follows
Never bake a chocolate cake at a temperature lower than 350°F. Higher heat creates a rapid rise, giving the cake that coveted “springy” crumb. If you’re in a high‑altitude area, add an extra 5‑10 minutes to the bake time and increase the oven temperature by 15°F to compensate for the thinner air. I once tried a 325°F setting and ended up with a soggy center that never set.
Why Your Nose Knows Best
Your sense of smell is a more reliable indicator than a timer. When the banana‑peanut‑butter glaze starts to bubble and the edges of the cake turn a deep mahogany, you’re ready to pull it out. If you smell a faint burnt sugar note, the cake is likely overcooked and will be dry. Trust the nose; it’s the secret weapon of seasoned bakers.
The 5‑Minute Rest That Changes Everything
After flipping, let the cake rest for exactly five minutes on the plate. This short pause lets the glaze settle, preventing it from sliding off the slice when you cut. Skipping this rest results in a messier presentation and a loss of that glossy finish that makes the cake look restaurant‑ready.
Butter‑Brush Boost
Before you pour the batter, brush the skillet with a thin layer of melted butter mixed with a teaspoon of honey. This creates a caramel barrier that makes the glaze extra shiny and adds a subtle floral sweetness. A friend tried skipping this step once; the cake still tasted great, but the glaze lacked that signature lacquered look.
The “Cool‑Then‑Warm” Flip Technique
If you’re nervous about flipping, chill the skillet for two minutes after baking. The brief chill firms the glaze, making it less likely to spill. Then, warm the serving plate for a second (as mentioned in the Kitchen Hack) and execute the flip. The result is a clean, glossy top that looks like it was plated by a pastry chef.
Creative Twists and Variations
This recipe is a playground. Here are some of my favorite ways to switch things up:
Nutty Crunch Variation
Add ½ cup of toasted pecans or walnuts to the banana base before baking. The nuts add a satisfying crunch that contrasts the soft crumb, and their buttery flavor amplifies the peanut butter. Perfect for guests who love a bit of texture.
White Chocolate Raspberry
Swap the dark chocolate chips for white chocolate chips and fold in ¼ cup of fresh raspberry puree into the batter. The tartness of raspberry cuts through the richness, while white chocolate adds a creamy sweetness. This version feels like a summer romance.
Spiced Chai Upside‑Down
Infuse the milk with a chai tea bag (or a blend of cinnamon, cardamom, and ginger) before adding it to the batter. The warm spices give the cake an exotic depth that pairs beautifully with the banana‑peanut‑butter base. Ideal for cozy autumn evenings.
Vegan Delight
Replace the butter with coconut oil, use flax eggs (1 tbsp ground flax + 3 tbsp water per egg), and swap dairy milk for almond milk. The flavor shifts slightly toward coconut, but the texture remains moist. This version proves you don’t need animal products to achieve decadence.
Mocha Madness
Add 1 tablespoon of instant espresso powder to the dry ingredients and drizzle a thin layer of espresso‑infused chocolate ganache over the finished cake. The double coffee boost turns the dessert into a caffeine‑laden treat that’s perfect after dinner.
Tropical Twist
Incorporate ½ cup shredded coconut into the batter and replace half the bananas with diced mango. The tropical flavors make the cake feel like a beach vacation, and the coconut adds a subtle chewiness that complements the peanut butter.
Storing and Bringing It Back to Life
Fridge Storage
Cover the cake loosely with aluminum foil and store it in the refrigerator for up to three days. The glaze may thicken slightly, but a quick reheating will bring it back to its glossy glory. Keep it on a shelf rather than the door to maintain a steady temperature.
Freezer Friendly
Slice the cake into individual portions, wrap each slice tightly in plastic wrap, then place them in a freezer‑safe bag. They’ll keep for up to two months. When you’re ready to enjoy, let the slice thaw at room temperature for 20 minutes, then pop it in a 300°F oven for 5‑7 minutes.
Best Reheating Method
To revive a refrigerated slice, place it on a microwave‑safe plate, add a tiny splash (about a teaspoon) of water or milk, and microwave on medium for 30 seconds. The added moisture creates steam that re‑hydrates the crumb, restoring that melt‑in‑your‑mouth texture without making it soggy.