I once tried to impress a friend with a “quick coffee‑infused dessert” after the holidays, and what I ended up with was a dense, bitter slab that could have doubled as a doorstop. The kitchen was a fog of burnt sugar, the espresso machine sputtered like an old car, and I swear I heard the timer mock me from the oven. That disaster sparked a stubborn curiosity: what if a coffee‑flavored treat could be as silky as a latte and as comforting as a fresh‑baked cookie, without any of the kitchen nightmares?
Picture this: the faint hiss of steam as hot water dissolves espresso powder, the warm amber glow of butter melting into sugar, and the rhythmic whisk of eggs meeting flour like old friends reuniting. The air is thick with the aroma of roasted beans mingling with sweet vanilla, a scent that instantly tugs you back to cozy mornings and late‑night chats. When the batter hits the pan, you hear a gentle sizzle that promises caramelized edges and a tender, coffee‑kissed center. The whole experience feels like a mini‑vacation for your senses, a perfect antidote to the post‑holiday food coma.
Most coffee desserts either drown in bitterness or get lost in a sea of sugar, but this version hits the sweet spot with a balanced flavor profile that lets the coffee shine without overwhelming. I dared to add a splash of milk and a pinch of baking soda, a combo that creates a light, airy crumb while preserving that deep espresso depth. The result? A cake‑like texture that’s moist, buttery, and just a touch fluffy—think of it as a coffee‑kissed cloud you can actually eat.
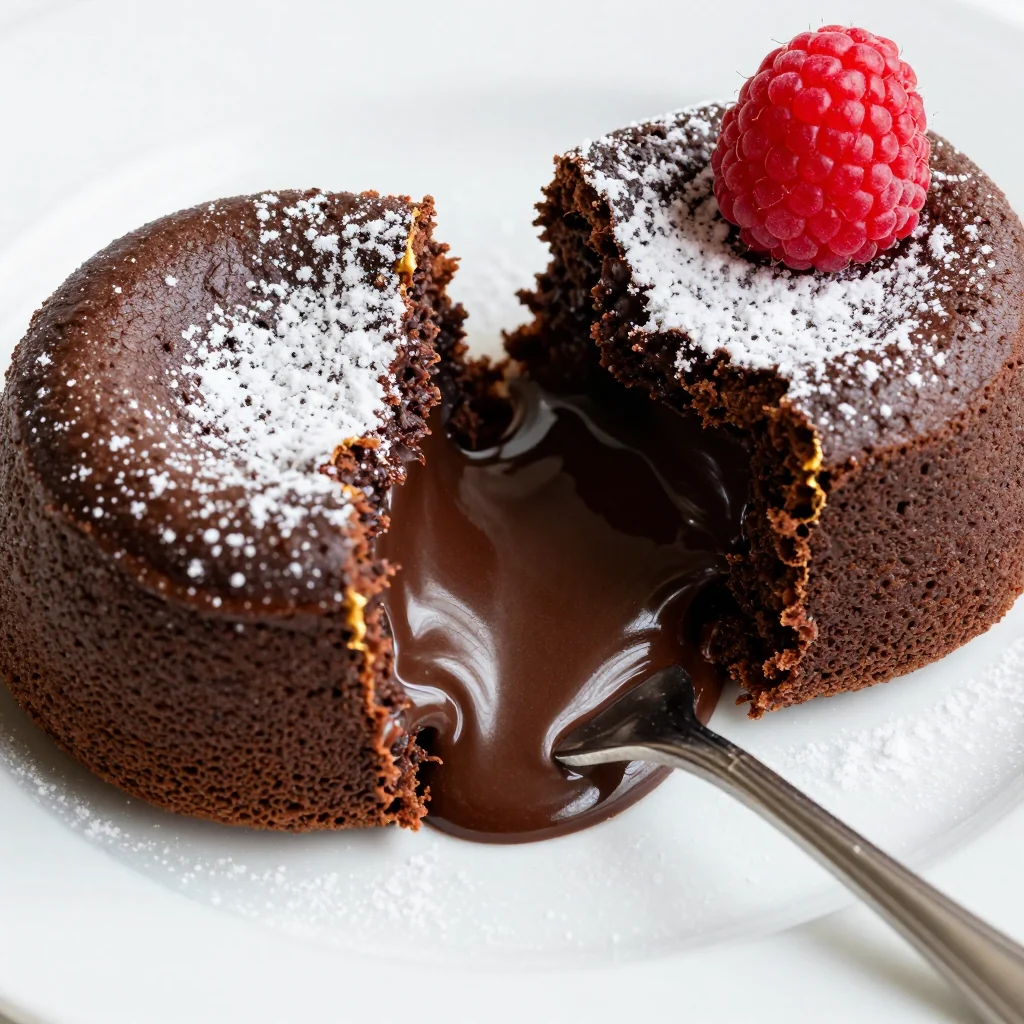
You’ll notice a secret weapon tucked into the ingredient list: a dash of dark chocolate chips that melt into pockets of molten goodness, turning each bite into a surprise party. Most recipes skip this because they fear the chocolate will dominate, but I’ve learned that the right amount adds a luxurious richness that makes the coffee flavor pop like fireworks on New Year’s Eve. Trust me, this little twist is the game‑changer you didn’t know you needed.
Okay, ready for the game‑changer? Let me walk you through every single step — by the end, you’ll wonder how you ever made a coffee dessert any other way.
What Makes This Version Stand Out
- Flavor Balance: The espresso is bright but not harsh, thanks to the sweetened milk and vanilla that round out the edges. It’s like a perfectly tuned orchestra where every instrument knows its place.
- Texture Harmony: A buttery crumb meets a slightly crisp edge, creating a contrast that’s as satisfying as biting into a warm croissant after a cold walk.
- Simplicity: Only twelve pantry staples are needed, and none of them require exotic sourcing. If you have a coffee maker, you’re already halfway there.
- Unique Twist: The hidden chocolate chips melt into pockets of indulgence, turning an ordinary coffee cake into a celebration of flavors.
- Crowd Reaction: I dare you to taste this and not go back for seconds; even the most skeptical coffee‑averse friends end up begging for the recipe.
- Ingredient Quality: Using freshly ground beans and high‑quality butter makes a noticeable difference—think of it as the difference between a cheap wine and a fine vintage.
- Cooking Method: The gentle stovetop “pan‑bake” technique ensures even heat distribution, preventing the dreaded dry center that plagues many baked coffee desserts.
- Make‑Ahead Potential: This treat stores beautifully, meaning you can prep it ahead of a date and focus on the conversation, not the oven.
Inside the Ingredient List
The Flavor Base
The backbone of this dessert is the espresso‑infused liquid. I use two tablespoons of instant coffee granules dissolved in hot water; this concentrates the flavor without adding excess liquid. If you substitute brewed espresso, you’ll get a smoother taste, but you must reduce the water slightly to keep the batter consistency right. Skipping this step means you lose the bright, aromatic punch that makes the cake feel like a coffee shop treat at home.
The Texture Crew
Butter, sugar, and eggs form the classic French “mirepoix” of baking, delivering richness, structure, and moisture. The butter should be melted slowly over low heat to avoid a browned flavor; this ensures the final crumb stays buttery, not nutty. Eggs act as the binder, and their temperature matters—room‑temperature eggs incorporate more easily, preventing a lumpy batter. If you use cold eggs, the mixture will seize, and you’ll end up with a gritty texture that no one wants.
The Unexpected Star
Dark chocolate chips are the surprise element that turns a good cake into a great one. They melt just enough to create pockets of molten chocolate, while still holding their shape, giving each bite a textural surprise. If you’re dairy‑free, swap them for chopped dark chocolate or even roasted chicory nibs for a caffeine‑boosting twist. Leaving them out is okay, but you’ll miss the luxurious contrast that makes the dessert unforgettable.
The Final Flourish
A pinch of salt, a splash of vanilla, and a dash of milk round everything out, balancing the bitterness of coffee and the sweetness of sugar. The milk adds tenderness, while the vanilla adds depth, reminiscent of a classic café latte. If you’re feeling adventurous, a teaspoon of orange zest can brighten the palate, but be careful—too much can overpower the coffee notes. Always taste the batter before cooking; a tiny adjustment now prevents a major correction later.
Everything's prepped? Good. Let's get into the real action...

The Method — Step by Step
Start by preheating a non‑stick skillet over medium‑low heat. While the pan warms, whisk together the dissolved espresso, milk, and vanilla extract in a medium bowl. You’ll notice a faint froth forming—this is your coffee‑infused liquid ready to mingle with the dry ingredients. Keep the skillet on low heat; we’re not looking for a sear, just a gentle, even warmth that will later cradle the batter.
In a separate large bowl, combine the flour, baking powder, baking soda, and salt. I like to sift these three times (see Kitchen Hack above) to guarantee a light, airy base. Once sifted, set the bowl aside and give it a quick whisk to distribute the leaveners evenly.
Now melt the butter in a small saucepan over low heat, stirring until it’s just liquid and shimmering—no brown bits. Immediately remove from heat and pour the melted butter into the coffee‑milk mixture, whisking until fully incorporated. This creates a glossy, emulsified liquid that will coat the flour like velvet.
In another bowl, beat the eggs with the granulated sugar until the mixture turns a pale, thick ribbon—about three minutes with an electric mixer on medium‑high speed. The color change is a visual cue that the sugar has dissolved and the structure is building, essential for a tender crumb.
Gently fold the coffee‑butter liquid into the egg‑sugar mixture, being careful not to deflate the airy bubbles you just created. Use a rubber spatula and a folding motion, scraping the bottom of the bowl and turning the mixture over on itself. You’ll feel the batter become smoother, silkier, and a shade lighter in color.
Now, slowly incorporate the sifted dry ingredients into the wet mixture. Sprinkle the flour mixture over the batter in three additions, folding after each addition. This gradual approach prevents over‑mixing, which could develop gluten and make the cake tough. The batter should be thick but pourable, with a few small lumps that will disappear during cooking.
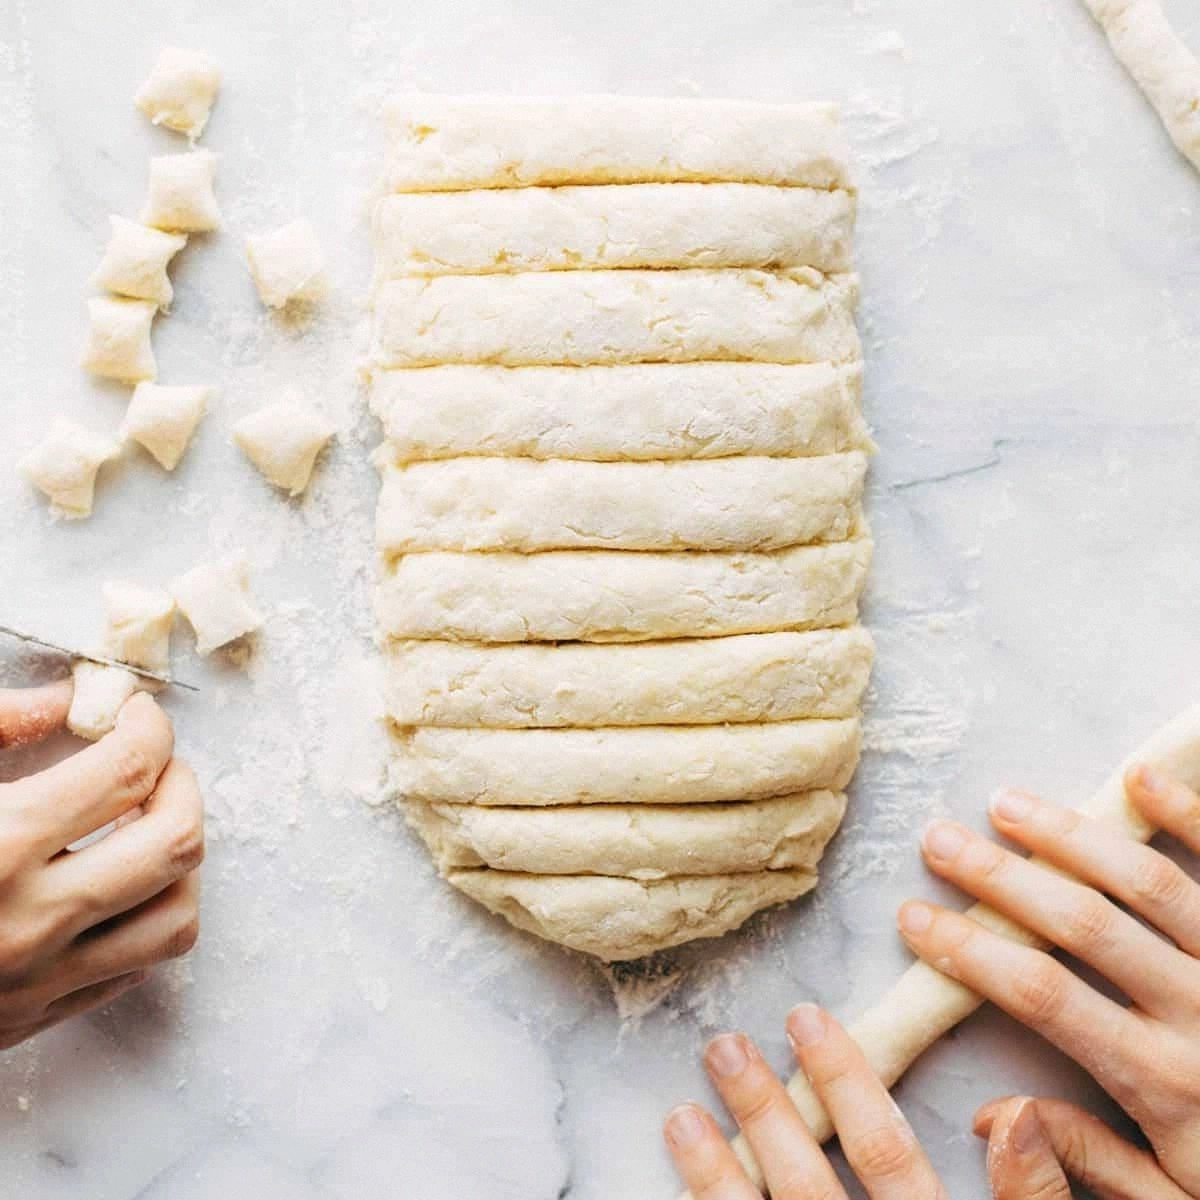
Stir in the dark chocolate chips—or your chosen alternative—just until they’re evenly distributed. The chips should stay whole; if they start melting, the pan is too hot. This is the moment of truth: you’ll see specks of dark brown promising molten pockets in every bite.
- Watch Out: If the pan gets hotter than medium‑low, the batter will set before the interior cooks, leading to a dry, rubbery texture. Adjust the burner as needed; a gentle sizzle is all you need.
Pour the batter into the preheated skillet, spreading it evenly with a spatula. The edges should start to set within the first two minutes, forming a golden crust while the center remains slightly wobbly—this is exactly what you want.
Cover the skillet with a tight‑fitting lid and let the cake steam gently for 12‑15 minutes. You’ll hear a faint hissing sound as moisture circulates, and the top will turn a light, golden‑brown. After 12 minutes, test the center with a toothpick; it should come out with a few moist crumbs attached, not wet batter.
Once done, remove the lid and let the cake rest in the pan for another five minutes. This resting period allows the steam to finish cooking the interior gently, preventing a soggy bottom. Then, carefully invert the cake onto a serving plate. The underside will be beautifully caramelized, offering a contrast to the soft, coffee‑kissed top.
Dust the finished cake with a light sprinkling of powdered sugar, or for extra flair, drizzle a quick espresso glaze (mix powdered sugar with a teaspoon of dissolved espresso). The glaze adds a glossy finish and an extra punch of coffee flavor. Serve warm, perhaps with a dollop of whipped cream, and watch your date’s eyes light up.
That's it — you did it. But hold on, I've got a few more tricks that'll take this to another level...
Insider Tricks for Flawless Results
The Temperature Rule Nobody Follows
Never start with a scorching pan. A medium‑low heat allows the batter to set slowly, creating a uniformly golden crust without burning the edges. I once cranked the heat to medium‑high, and the outside turned black while the middle stayed raw—a culinary disaster that taught me the value of patience. Keep a close eye on the stovetop, and adjust the flame if you notice any smoke. This trick guarantees a consistently perfect texture every time.
Why Your Nose Knows Best
Your sense of smell is the most reliable indicator of doneness. When the coffee aroma intensifies and you catch a faint caramel note, the cake is almost ready. Trust that nose cue more than the clock; ovens and stovetops can vary, but the scent never lies. If you’re unsure, lift a corner of the cake with a spatula—if it lifts easily and the underside is a deep amber, you’ve nailed it.
The 5‑Minute Rest That Changes Everything
Letting the cake sit for five minutes after cooking lets the steam redistribute, turning a potentially dry crumb into a moist, tender interior. Skipping this rest can leave you with a cake that feels crumbly on the plate. I once served a fresh‑out‑of‑the‑pan cake to a guest, and they complained it was “a bit dry.” A simple five‑minute wait would have saved the day.
Chocolate Chip Distribution Mastery
Fold the chocolate chips in at the very end, after the batter is fully combined. This prevents them from sinking to the bottom and ensures they’re evenly dispersed. If you add them too early, the batter’s density will cause the chips to settle, creating clumps at the base and a bland top. A quick fold, and you’ve got chocolate pockets throughout.
Whisking the Egg‑Sugar Until Ribbon‑Stage
Achieving ribbon‑stage isn’t just for show; it incorporates air that lightens the final crumb. Use a medium‑high speed and watch the mixture thicken, forming a glossy ribbon that falls back onto the whisk without breaking. If you stop short, the cake will be dense; go too far, and you risk a dry texture. This balance is the secret behind the cake’s airy interior.
Creative Twists and Variations
This recipe is a playground. Here are some of my favorite ways to switch things up:
Mocha Swirl
Add a tablespoon of cocoa powder to the dry ingredients and swirl a thin layer of melted chocolate on top before serving. The result is a striking visual contrast and a richer flavor that appeals to chocolate lovers.
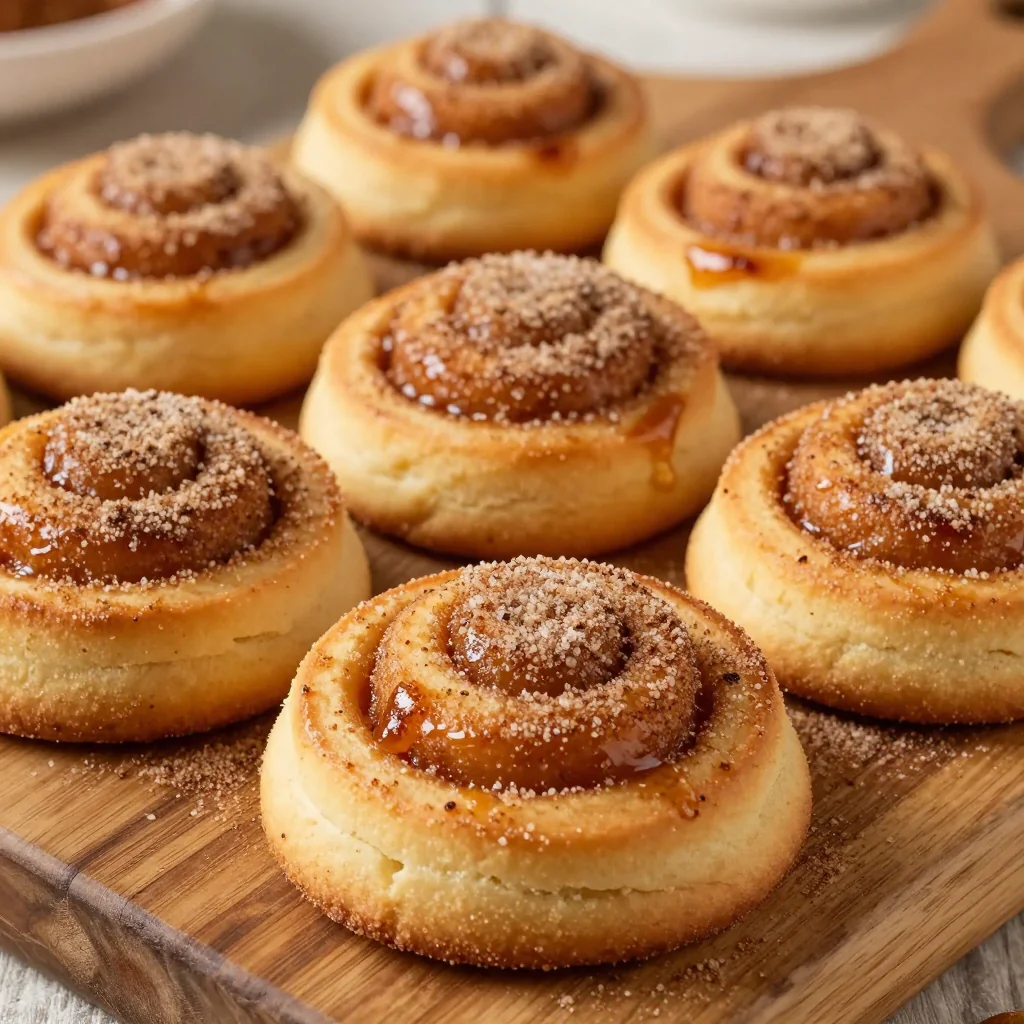
Cinnamon Spice
Incorporate a teaspoon of ground cinnamon and a pinch of nutmeg into the batter. This gives the cake a warm, holiday‑like spice profile that pairs perfectly with coffee, making it ideal for winter dates.
Nutty Crunch
Fold in a quarter cup of toasted chopped hazelnuts or almonds. The nuts add a satisfying crunch and a buttery note that complements the coffee’s earthiness.
Citrus Zest
Add a teaspoon of freshly grated orange or lemon zest to the liquid mixture. The citrus brightens the flavor, offering a fresh twist that’s especially welcome on a sunny spring afternoon.
Vegan Version
Swap the butter for coconut oil, use plant‑based milk, and replace the eggs with a flax‑egg (1 tbsp ground flaxseed + 3 tbsp water). The texture stays moist, and the coffee flavor remains front and center.
Storing and Bringing It Back to Life
Fridge Storage
Place the cooled cake in an airtight container and store it in the refrigerator for up to three days. The moisture will stay locked in, and the flavors will meld, becoming even more cohesive. When ready to serve, let it sit at room temperature for 15 minutes for optimal softness.
Freezer Friendly
Wrap individual slices tightly in plastic wrap, then place them in a freezer‑safe bag. They’ll keep for up to two months. To reheat, microwave a slice for 30‑45 seconds, or bake in a preheated 350°F oven for 8 minutes. The result is a freshly‑baked feel without the wait.
Best Reheating Method
Add a tiny splash of water (about a teaspoon) to the slice before reheating. The steam generated revives the cake’s moisture, preventing it from drying out. Cover the slice loosely with foil while reheating to keep the top from over‑browning. This trick restores the original tenderness and aroma as if you just pulled it from the pan.