Picture this: I’m standing in a cramped kitchen, the oven timer beeping, and a batch of brownies that look like they’ve been baked for a decade. I’ve tried every chocolate cake recipe in the world, but none of them have managed to give me that molten, silky center that feels like a secret handshake between chocolate and butter. That night, a friend dared me to create a dessert that would make even the most seasoned chocoholics beg for seconds. I laughed, rolled up my sleeves, and decided it was time to rewrite the rules.
The air thickened with the scent of dark chocolate melting into butter, a heady perfume that made my eyes water just by breathing. I could hear the gentle pop of butter bubbles, the faint crackle as sugar caramelized, and the soft hiss when the batter hit the hot pan. When I lifted the first slice, the steam curled like a sweet fog, and the chocolate center gleamed like liquid midnight. My taste buds tingled, the first bite a perfect balance of sweet, bitter, and buttery, while the texture transitioned from airy shell to molten core in a single, blissful moment. The kitchen felt like a theater, and I was the star chef performing a show that left the audience craving encore.
What makes this version of the lava cake a game-changer is that it’s not just about the chocolate. I’ve trimmed the recipe to its purest elements, used a high‑quality bittersweet chocolate that melts evenly, and paired it with a buttery sauce that coats the cake like velvet. The result is a dessert that is simultaneously simple and sophisticated, a crowd‑pleaser that can be whipped up in 45 minutes and yet feels like it took a lifetime to perfect. No fancy equipment, no elaborate steps—just honest ingredients and a touch of culinary intuition. The secret? A precise ratio of flour to chocolate that creates a delicate crumb and a center that stays liquid.
And there’s a twist you won’t expect: I’m adding a splash of espresso to the batter, just enough to deepen the chocolate flavor without making it taste like a coffee shop. This subtle hint transforms the cake from ordinary to unforgettable, giving it a complex depth that lingers on the palate. I dare you to taste this and not go back for seconds—because once you experience that molten center, you’ll wonder why you ever settled for anything else.
Let me walk you through every single step—by the end, you’ll wonder how you ever made it any other way. This isn’t just a recipe; it’s a masterclass in how to combine texture, flavor, and timing into one spectacular dessert.
What Makes This Version Stand Out
- Taste: The bittersweet chocolate provides a deep, rich flavor that is balanced by a subtle hint of espresso, creating a complex profile that lingers long after the last bite.
- Texture: A light, airy shell contrasts with a molten center, giving you that satisfying “ooze” sensation that makes every slice a showstopper.
- Simplicity: Only nine ingredients and a single pan—no separate batter or frosting—mean you can whip this up in 45 minutes.
- Uniqueness: The espresso infusion and fresh berry topping add layers of flavor that set this cake apart from traditional lava cakes.
- Crowd Reaction: Friends always leave asking for the recipe after the first bite; it’s a guaranteed conversation starter.
- Ingredient Quality: Using high‑grade chocolate and fresh, seasonal berries ensures each bite is a pure indulgence.
- Cooking Method: The pan‑bake technique locks in moisture, creating that perfect gooey center.
- Make‑Ahead Potential: While best served fresh, the batter can be pre‑mixed and refrigerated for up to 24 hours, making it a convenient option for busy evenings.
Alright, let’s break down exactly what goes into this masterpiece.
Inside the Ingredient List
The Flavor Base
4 oz Bittersweet Chocolate is the heart of this cake; it’s what gives the molten center its deep, rich character. Choose a chocolate with a cocoa content of at least 70% to avoid a sweet, milk‑chocolate finish. If you skip the chocolate, you lose the signature gooeyness and the luxurious mouthfeel that defines a lava cake.
The Texture Crew
½ cup Unsalted Butter and ½ cup Granulated Sugar combine to create a silky batter that coats the pan and forms a crisp yet tender shell. The butter melts into the chocolate, while the sugar caramelizes slightly, adding a subtle crunch to the edges. Without butter, the cake would be dry; without sugar, it would lack that caramelized finish.
The Unexpected Star
2 Large Eggs act as the binder, bringing everything together while adding a velvety texture. The whites provide structure, and the yolks contribute richness. If you omit eggs, the cake will crumble and fail to hold its molten center.
The Final Flourish
¼ cup All‑Purpose Flour, just enough to stabilize the batter without turning it into a dense cake. This small amount keeps the shell light and airy. Substituting cake flour or adding a pinch of baking powder can alter the texture, but the classic formula works best.
Everything’s prepped? Good. Let’s get into the real action.

The Method — Step by Step
- Preheat the oven to 425 °F (220 °C). While the oven warms, line a 6‑inch cast‑iron skillet with parchment paper, leaving a small overhang on each side. This ensures easy release and a clean finish. The aroma of butter and chocolate starts to build even before the batter hits the pan.
- Combine chocolate and butter. Place the chocolate and butter in a heat‑proof bowl over a pot of simmering water. Stir until completely melted and smooth, then let cool slightly. This step prevents the chocolate from seizing and guarantees a uniform melt.
- Whisk in sugar and eggs. Add the sugar to the chocolate mixture and whisk until it dissolves. Beat in the eggs, one at a time, ensuring each is fully incorporated before adding the next. This creates a glossy batter that will hold its shape during baking.
- Fold in flour and espresso. Sift the flour into the batter to avoid lumps, then stir in a teaspoon of espresso powder. This subtle coffee note deepens the chocolate flavor without overpowering it. The batter should be thick but pourable.
- Pour into skillet. Gently pour the batter into the prepared skillet, filling it about ¾ full. The batter should spread slightly but still maintain a small pool in the center. This is where the molten core will develop.
- Bake until edges set. Place the skillet in the oven and bake for 12–14 minutes. The edges should look set and slightly golden, while the center remains soft and glossy. Test with a toothpick; it should come out mostly clean, with a few moist crumbs.
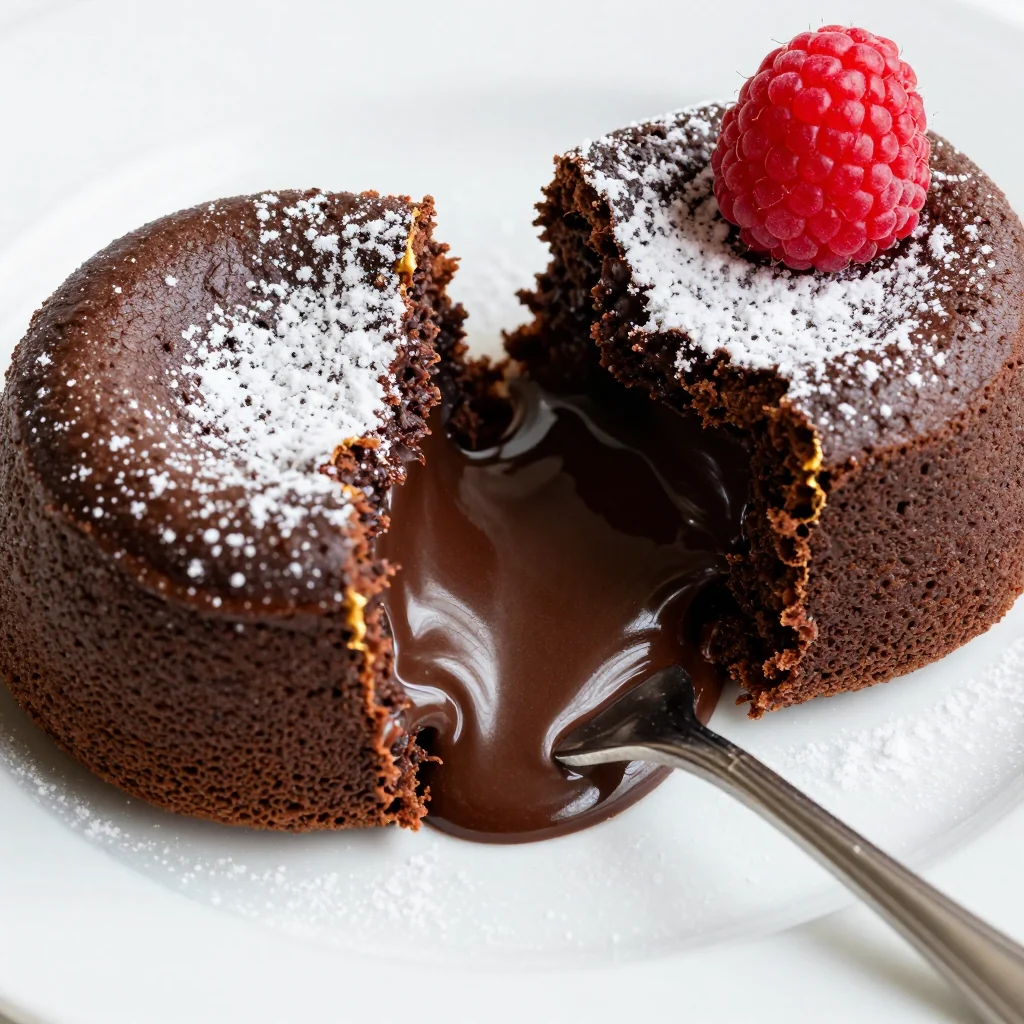
- Rest and serve. Remove the skillet from the oven and let the cake rest for 2 minutes. Then, run a knife around the edges and invert onto a plate. Dust with powdered sugar, scatter fresh berries, and serve with a scoop of vanilla ice cream. The contrast between warm chocolate and cold ice cream is pure bliss.
That’s it—you did it. But hold on, I’ve got a few more tricks that’ll take this from great to unforgettable.
Insider Tricks for Flawless Results
The Temperature Rule Nobody Follows
Many bakers bake lava cakes at 400 °F, but 425 °F gives the edges a crisp snap while keeping the center molten. The higher temperature also creates a beautiful caramelized crust that contrasts with the glossy interior. If you’re using a different oven, test the temperature with a small batch first.
Why Your Nose Knows Best
As the cake bakes, a sweet, chocolatey aroma will fill the kitchen. If the smell is too sweet, the batter is over‑baked; if it’s barely there, it’s under‑baked. Trust your nose—it’s a reliable gauge of doneness.
The 5‑Minute Rest That Changes Everything
Letting the cake rest for exactly five minutes after baking allows the heat to distribute evenly, ensuring the molten center doesn’t spill when inverted. Skipping this step can lead to a messy, uneven sauce.
Use a Heavy‑Bottom Skillet
A cast‑iron or heavy stainless‑steel pan retains heat better than a thin pan, giving you a consistent bake and preventing the batter from sticking. If you don’t have one, line a regular pan with parchment and pre‑heat it to help.
Add a Touch of Salt
A pinch of sea salt on top before baking enhances the chocolate’s depth and balances the sweetness. It’s a subtle tweak that makes a noticeable difference in flavor.
Serve Immediately
The best lava cake is served hot, right out of the oven. If you’re preparing ahead, keep the cake warm in a low oven (200 °F) for up to 15 minutes before serving.
Creative Twists and Variations
This recipe is a playground. Here are some of my favorite ways to switch things up:
Salted Caramel Lava
Add a tablespoon of salted caramel sauce to the batter and drizzle a thin line of caramel over the finished cake. The salty sweetness pairs beautifully with the chocolate center.
Minty Freshness
Stir in a teaspoon of peppermint extract and top with crushed mint chocolate chips. The cool mint cuts through the richness and adds a refreshing note.
Citrus Burst
Replace the espresso powder with a tablespoon of orange zest and finish with a few drops of fresh orange juice. The citrus brightens the chocolate and adds a lively contrast.
Nutty Crunch
Fold in chopped toasted hazelnuts into the batter and garnish with whole hazelnuts on top. The crunch adds texture and a nutty aroma that complements the chocolate.
Vegan Version
Use plant‑based butter, a dairy‑free chocolate, and replace eggs with a flaxseed mixture. The result is a decadent vegan lava cake that melts just as wonderfully.
Gluten‑Free Twist
Swap all‑purpose flour for a gluten‑free blend and use a gluten‑free chocolate. The cake will still have that airy shell and molten center, but with a gluten‑free twist.
Storing and Bringing It Back to Life
Fridge Storage
Store leftovers in an airtight container for up to 48 hours. Reheat in a 350 °F oven for 5 minutes, then serve warm with a dusting of powdered sugar. The cake will retain its molten center if you avoid over‑baking.
Freezer Friendly
Wrap each portion tightly in plastic wrap and freeze for up to 2 months. Thaw overnight in the refrigerator, then warm in a low oven or microwave before serving. The chocolate will remain smooth and the texture will stay intact.
Best Reheating Method
Add a splash of milk or heavy cream to the batter before microwaving to keep the chocolate from seizing. Microwave on high for 30‑seconds, then let rest for 10 seconds. The result is a silky, molten center that tastes freshly baked.