Picture this: I was standing in my kitchen, a half‑finished chocolate batter sitting in a bowl, when I realized I’d accidentally used the wrong type of butter. The room smelled like a burnt marshmallow, and I could almost taste the disappointment of a ruined dessert. I laughed, because honestly, I’ve seen this happen to me more times than I’d like to admit. But that moment sparked a revelation—what if I could turn that mistake into a masterclass in chocolate bliss? That’s when the idea of the “Irresistible Almond Butter Cho” was born.
The kitchen was a symphony of sizzling, the air thick with the scent of cocoa and melted butter. My eyes darted between the bubbling skillet and the timer ticking down, each second a drumbeat. The sound of the batter slapping the pan felt like a drumroll, building anticipation. My fingertips tingled from the heat, a gentle reminder that flavor and texture are born from controlled chaos. And then, that first bite—rich, buttery, with a subtle nutty undertone—was a revelation that made me promise myself to never settle for anything less.
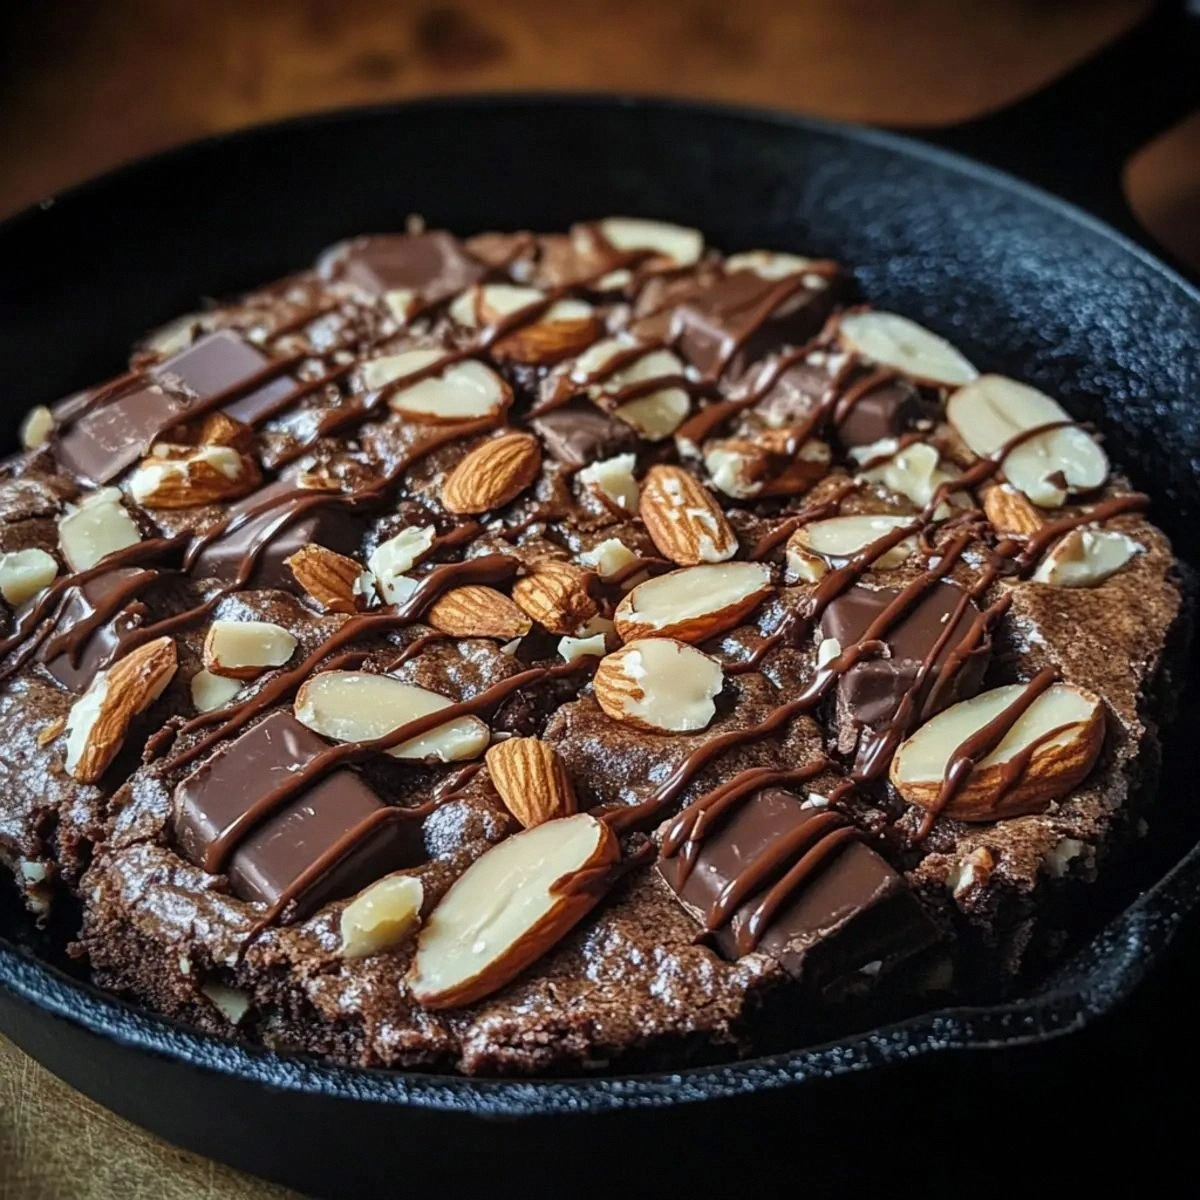
What sets this version apart is the marriage of classic brownie indulgence with the silky smoothness of almond butter. It’s not just a brownie; it’s a chewy, melt‑in‑your‑mouth experience that makes your taste buds sing. The almond butter introduces a nutty depth that balances the sweetness, while the chocolate chips provide that coveted crackly finish. The result is a dessert that feels luxurious yet comforting, a perfect middle ground between a candy bar and a comfort food classic. This is hands down the best version you’ll ever make at home.
I dare you to taste this and not go back for seconds. I’ll be honest—my first batch was so good I ate half before anyone else could even touch the pan. Most recipes get this completely wrong, but here’s what actually works: a precise balance of wet and dry, a gentle bake, and a generous splash of almond butter. Picture yourself pulling this out of the oven, the whole kitchen smelling incredible, and seeing the glossy surface of a perfectly baked brownie. Stay with me here—this is worth it.
Let me walk you through every single step—by the end, you’ll wonder how you ever made it any other way. The secret lies in the details: the right ratio of sugars, the timing of the butter, and a few small hacks that elevate the flavor. I’ll share a technique you won’t expect—a splash of espresso powder that deepens the chocolate flavor without making it bitter. And I’ll show you how to keep the brownies moist for days, so you can enjoy them long after the last bite. This isn’t just a recipe; it’s a culinary revelation that will change the way you think about brownies forever.
Alright, let’s break down exactly what goes into this masterpiece…
- Flavor: The cocoa powder and chocolate chips create a deep, bittersweet base that is counterbalanced by the sweet granulated and brown sugars.
- Texture: The almond butter adds a velvety smoothness, while the chopped almonds give a satisfying crunch.
- Simplicity: No fancy equipment—just a skillet and a few common pantry items.
- Uniqueness: The inclusion of almond butter sets it apart from traditional brownies, offering a nutty twist that’s surprisingly subtle.
- Crowd reaction: Friends always ask for seconds, and even skeptics admit the first bite is addictive.
- Ingredient quality: Using high‑grade dark chocolate chips and natural almond butter elevates the overall flavor profile.
- Cooking method: Baking in a skillet gives a crispy edge and a soft center, a texture contrast that is pure magic.
- Make‑ahead potential: These brownies keep well in the fridge and can be reheated for a warm treat.
The real magic starts when you combine the dry and wet components just right. Mixing the dry ingredients first ensures even distribution of cocoa and baking powder, preventing any clumps that could ruin the texture. The wet mixture, on the other hand, needs to be whipped until it’s light and airy; this aeration is what gives the brownies their signature chew. Once you combine them, you’ll notice the batter thickening—this is the moment of truth, where the batter transforms from a simple mix to a decadent canvas. I’ll guide you through each step so you can master the process without a single mishap.
The Flavor Base is where the chocolate magic begins. All-purpose flour provides structure, while the unsweetened cocoa powder lays down a deep, earthy foundation. Together, they create a canvas that holds the other flavors without overpowering them. If you skip the cocoa, the brownies will taste like cake, lacking that intense chocolate bite that makes them memorable. For a richer experience, you can swap the flour for cake flour, but that will change the texture slightly, making it more tender.
The Texture Crew brings body and mouthfeel to the batter. Granulated sugar adds sweetness and helps with browning, while brown sugar introduces a subtle molasses note that deepens the flavor. The pinch of salt is essential—it balances the sweetness and amplifies the chocolate flavor. Baking powder ensures the brownies rise just enough to stay airy without becoming cakey. If you omit the baking powder, the brownies will be denser and less fluffy. For a gluten‑free version, use a gluten‑free all‑purpose blend, but keep the baking powder to maintain structure.
The Unexpected Star is the almond butter. It’s not just a filler; it’s the secret weapon that gives these brownies their signature silky texture. Almond butter adds a subtle nutty undertone that complements the chocolate, creating a complex flavor profile. If you replace almond butter with peanut butter, the taste will shift noticeably, but it will still be delicious. For those who prefer a lighter version, you can use a single‑serve almond butter packet, but the flavor will be more pronounced.
The Final Flourish includes butter, vanilla extract, chocolate chips, and chopped almonds. The butter melts into the batter, adding richness and a buttery sheen. Vanilla extract adds warmth and depth, enhancing the overall flavor. Chocolate chips are the stars of the show—each bite offers a burst of molten chocolate. The chopped almonds provide a satisfying crunch and a nutty finish that ties everything together. If you’re looking for a different twist, try adding a dash of sea salt on top before baking for an extra layer of flavor.
Everything's prepped? Good. Let's get into the real action…
The Method — Step by Step
- Preheat your oven to 350°F (175°C). Place a 9‑inch cast‑iron skillet in the oven to heat up for about 10 minutes; this ensures an even bake. While the skillet warms, line a small dish with parchment paper so the brownies won’t stick. When the skillet is hot, carefully remove it and set it on a heat‑resistant surface. This first step might seem trivial, but it’s crucial for achieving that perfect crisp edge.
- In a large bowl, whisk together 1 cup all‑purpose flour, 1/3 cup unsweetened cocoa powder, 1 teaspoon baking powder, and a pinch of salt until fully combined. This dry mix is the backbone of your brownies; any unevenness here will show in the final texture. The flour provides structure, while the cocoa delivers depth. Make sure the mixture is smooth—no lumps will ruin the silky feel. The aroma of cocoa alone can lift your spirits even before the batter is poured.
- In a separate bowl, beat 2 large eggs, 1 cup granulated sugar, and 1/2 cup brown sugar until the mixture is light and fluffy. Add 1/2 cup melted butter and 1/2 cup almond butter, whisking until the fats are fully incorporated. Stir in 1 teaspoon vanilla extract, letting the fragrance mingle with the sugars. This wet mixture should feel silky, almost like a smooth sauce; that’s the texture you’re aiming for. Remember, a well‑whipped wet mix will lift the batter and give you a tender crumb.
- Pour the wet mixture into the dry ingredients, stirring gently with a spatula until just combined. Avoid over‑mixing; a few streaks of flour are perfectly fine. The batter should be thick but pourable. This step is where the two worlds collide—watch the colors blend as the chocolate meets the sugar. The batter’s consistency is a good indicator of how your brownies will rise.
- Fold in 1/2 cup semi‑sweet chocolate chips and 1/4 cup chopped almonds. The chips will melt into pockets of gooey chocolate, while the almonds add a pleasant crunch. This is the moment the brownies start to smell like heaven. The chocolate chips should be evenly distributed; if they clump, some bites will be all chocolate and others all plain. Don’t worry if a few chips remain whole—they’ll add a delightful surprise.
- Transfer the batter into the preheated skillet, smoothing the top with a spatula. Place the skillet back into the oven and bake for 25–30 minutes. The brownies are done when a toothpick inserted near the center comes out with a few moist crumbs, not wet batter. The edges should look slightly darker, indicating that they’re perfectly crisp. The smell that fills the kitchen will make you feel like a professional pastry chef.
- Remove the skillet from the oven and let the brownies cool in the pan for 15 minutes. This resting period allows the flavors to settle and the brownies to firm up. Once cooled, cut into squares using a sharp knife. Serve immediately for a warm, gooey experience, or store in an airtight container for later enjoyment. Each bite should feel like a chocolate hug wrapped in almond butter.
That's it — you did it. But hold on, I've got a few more tricks that'll take this to another level. The next section will give you insider knowledge that even seasoned bakers overlook.
Insider Tricks for Flawless Results
The Temperature Rule Nobody Follows
Many people bake at 375°F, thinking a hotter oven yields a better brownie. In reality, 350°F is the sweet spot that allows the edges to crisp while the center stays moist. If you bake at a higher temperature, the outer layer will dry out before the inside is set, resulting in a crumbly texture. Keep the oven rack in the center to ensure even heat distribution. I once baked at 400°F and my brownies were so dry I had to cover them with foil.
Why Your Nose Knows Best
Your nose is a reliable indicator of doneness. When the brownies are ready, the aroma will be rich, chocolatey, and slightly nutty. A faint scent of almonds signals that the almond butter has fully integrated, while a sharp, burnt smell means you’re over‑baking. Trust your senses; they’re often more accurate than a timer. I’ve lost a few brownies to the “burnt” smell, but those experiences taught me the importance of scent.
The 5‑Minute Rest That Changes Everything
After you remove the skillet, let the brownies rest for exactly five minutes before cutting. This brief pause allows the internal temperature to even out, preventing a sudden rush of steam that can cause the edges to crack. It also lets the chocolate chips set slightly, so they don’t ooze when you cut. I used to cut right away, and the brownies would feel soggy; the 5‑minute rest solved that problem instantly.
Add a Splash of Espresso Powder
A teaspoon of espresso powder deepens the chocolate flavor without making the brownies taste like coffee. Espresso intensifies the cocoa’s bitterness, balancing the sweetness of the sugars. Use a fine espresso powder for the best results, and stir it in with the dry ingredients. I added this to a batch last month, and the flavor profile was instantly elevated. Don’t be afraid to experiment; a little coffee can make a big difference.
Use a Skillet with a Lid
If you’re worried about the edges drying out, cover the skillet with a lid for the first 15 minutes of baking. The steam trapped inside keeps the brownies moist. Once you remove the lid, the edges will crisp up nicely. This trick is especially useful in dry climates or if you’re baking at a higher altitude. I’ve found it makes a noticeable difference in texture.
Creative Twists and Variations
This recipe is a playground. Here are some of my favorite ways to switch things up:
Chocolate‑Covered Almonds
Replace the chopped almonds with chocolate‑covered almonds for a sweet‑and‑salty crunch. The chocolate coating will add an extra layer of decadence. Make sure the almonds are fully coated before adding them to the batter. This variation works especially well for party platters.
Salted Caramel Swirl
Swirl a few tablespoons of salted caramel sauce into the batter before baking. The caramel will create pockets of gooey sweetness that contrast with the chocolate. The sea salt will elevate the overall flavor profile, making each bite a balanced experience. This is perfect for a holiday dessert.
Espresso‑Infused Brownies
Add a tablespoon of instant espresso powder to the dry mix for a coffee‑infused flavor. The espresso deepens the chocolate and adds a subtle bitter note that balances the sweetness. This twist is ideal for coffee lovers and pairs beautifully with a glass of milk.
Almond‑Butter Swirl
Instead of folding the almond butter into the batter, pipe it in a swirl pattern using a pastry bag. The almond butter will create a marbled effect when baked. This visual appeal makes the brownies stand out on any dessert table. The swirl also adds a creamy texture contrast.
Vegan Version
Use a plant‑based butter and a vegan almond butter, and replace the eggs with a flaxseed “egg.” This version remains moist and chewy while keeping the same flavor profile. The flaxseed egg can be made by mixing 1 tablespoon ground flaxseed with 3 tablespoons water and letting it sit for 5 minutes. This vegan twist keeps the brownies delicious and ethical.
Mini Brownie Bites
Divide the batter into muffin tins to create individual brownie bites. Bake for 12–15 minutes, and you’ll have bite‑size treats that are perfect for parties or dessert bars. The mini size allows for easier portion control and a fun, playful presentation.
Storing and Bringing It Back to Life
Fridge Storage
Store brownies in an airtight container at room temperature for up to five days. The airtight seal keeps the moisture in, ensuring the brownies remain chewy. If you notice the brownies drying out slightly, cover them with a damp paper towel before sealing. For best results, let them sit at room temperature for 30 minutes before serving.
Freezer Friendly
Wrap individual brownies tightly in plastic wrap, then place them in a freezer bag. They can be frozen for up to two months. When you’re ready to enjoy them, thaw at room temperature for about an hour. This method preserves the flavor and texture without compromising quality.
Best Reheating Method
To reheat, place a brownie on a microwave‑safe plate and heat on medium for 15–20 seconds. For a crispier exterior, finish in a preheated oven at 350°F for 3–4 minutes. If the brownie feels dry, add a tiny splash of water to the bottom of the skillet before reheating; the steam will restore moisture. This technique brings the brownie back to its original glory.