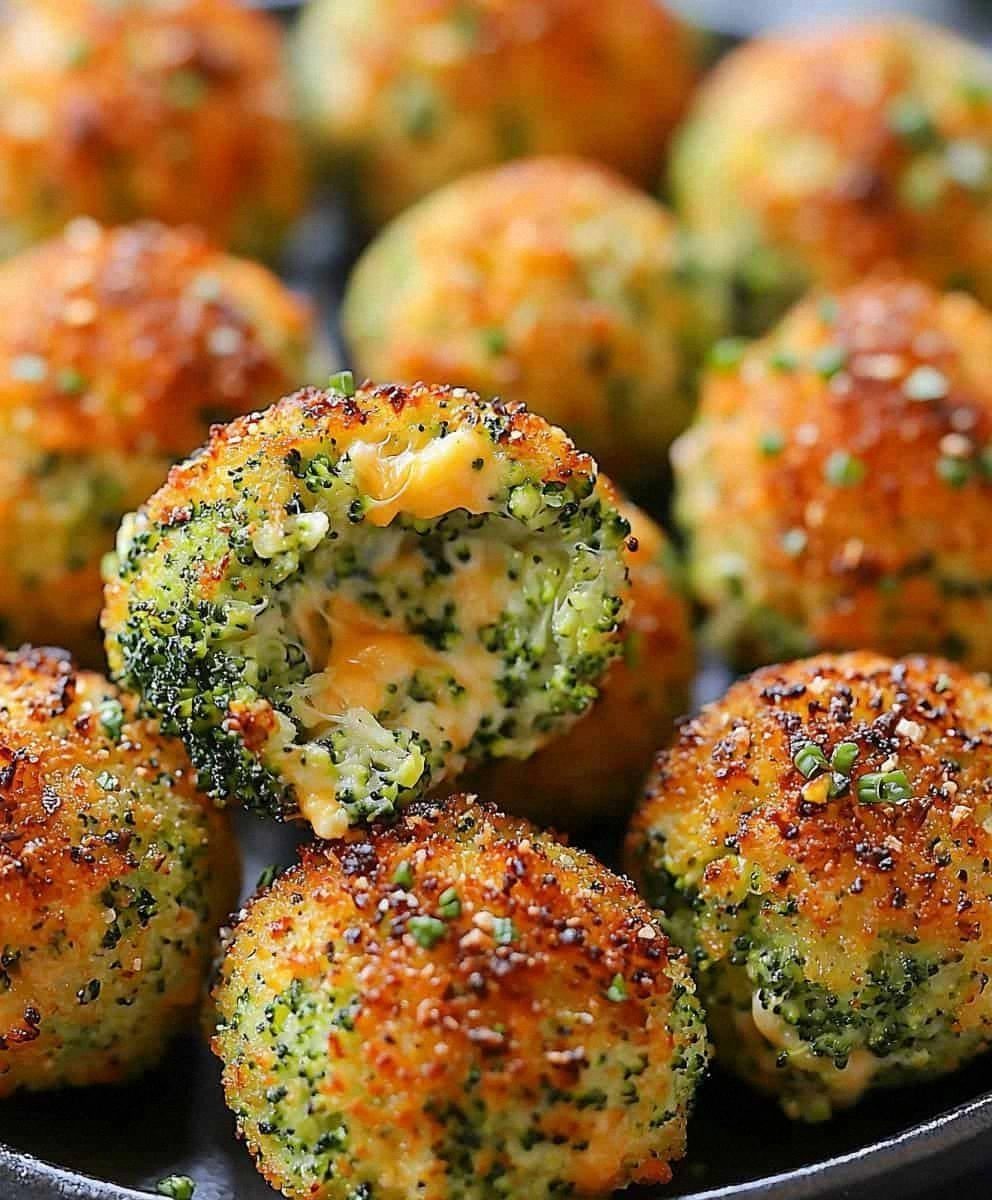
I was halfway through a frantic week of deadlines, the kitchen a chaotic battlefield of pans and pots, when my phone buzzed with a text from a friend: “You’ve got to try this apple chip thing.” The idea was simple, but the promise of crisp, buttery, sweet‑spicy flavor made my stomach growl louder than the blaring alarm on my phone. I stared at the array of apples on my counter, each one promising a juicy bite, and thought, “Why not turn this into a snack that’s almost too good to share?” That night, after a long day, I decided to test a new recipe that would make every kitchen moment feel like a small celebration. I dared myself to taste this and not go back for seconds, and I’ve never looked back.
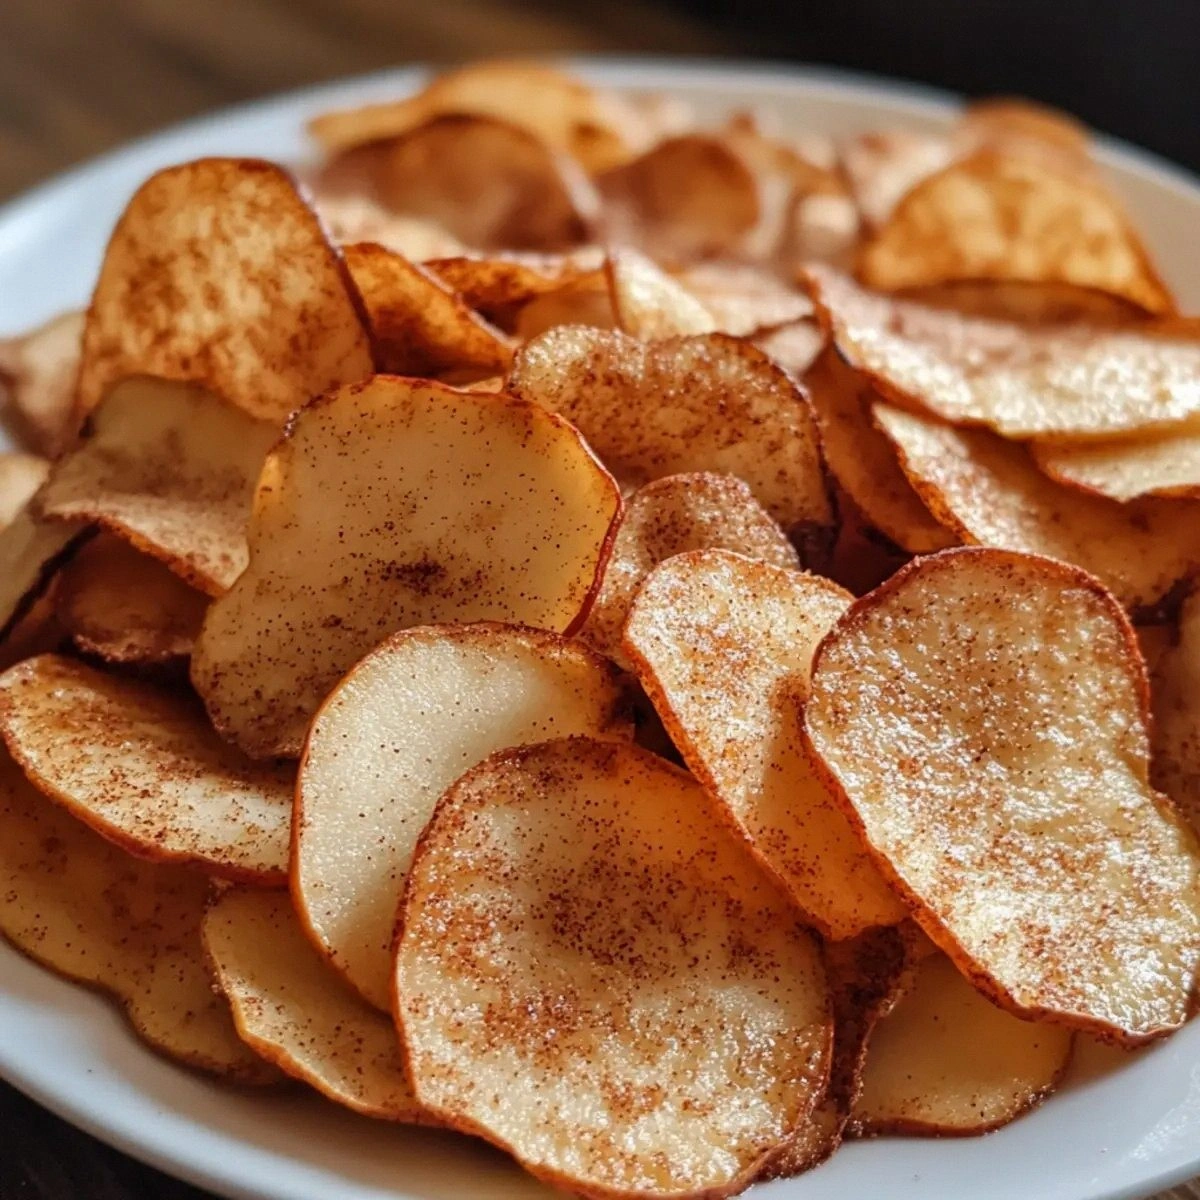
The first time I baked these chips, the smell that filled the air was a warm, cinnamon‑sweet hug that made every corner of the house feel like a cozy cabin. The sound of the oven door closing was the prelude to a sizzle that would later turn into a crunchy, caramelized crunch. The texture of the apple slices, thin and tender before baking, became a crisp, slightly chewy bite that melted in the mouth. The flavor exploded with a sweet‑spicy kick that danced across the tongue, leaving a lingering warmth that was both comforting and adventurous. The sight of the golden edges, the way they curled like a tiny, edible sunrise, was a visual promise of the delight to come.
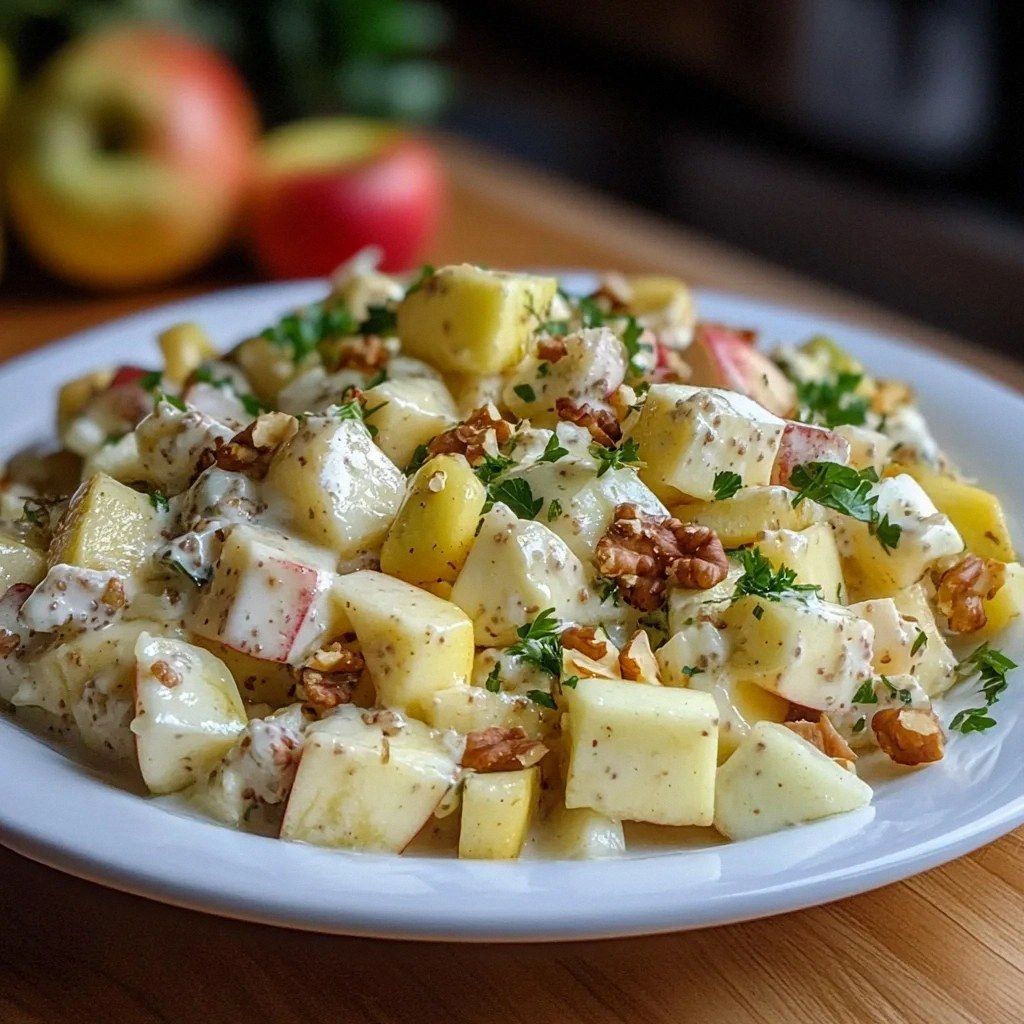
What makes this version hands down the best you’ll ever make at home is the balance of techniques and ingredients that work together like a well‑tuned orchestra. I’ve taken a simple apple chip concept and elevated it with a yogurt‑honey glaze that coats each slice like velvet, while the nuts add a satisfying crunch that shatters like thin ice. The combination of Fuji or Honeycrisp apples—chosen for their firmness and natural sweetness—provides a sturdy canvas that holds the glaze without becoming soggy. The lemon juice cuts through the sugar, adding a bright, fresh note that keeps the flavor from tipping into cloying. The result is a snack that satisfies both sweet cravings and the desire for a crisp, savory bite.
Most recipes get this completely wrong. They either over‑bake the apples, leaving them dry, or under‑bake, resulting in a mushy mess that’s hard to eat. The secret lies in the precise timing and the right amount of glaze that locks in moisture while creating a caramelized crust. I’ve also discovered that letting the apple slices sit in the glaze for a few minutes before baking allows the flavors to seep in, producing a depth that you won’t find in store‑bought chips. This technique is a game‑changer that transforms a simple snack into a gourmet treat you’ll brag about.
Picture yourself pulling this out of the oven, the whole kitchen smelling incredible, the aroma of cinnamon and fresh apples mingling with the sweet scent of honey. The moment the tray opens, a puff of steam rises, and the chips look like tiny, golden moons. The anticipation is palpable, and you can’t help but reach for a handful. That sizzle when it hits the pan? Absolute perfection. Okay, ready for the game‑changer? Let me walk you through every single step — by the end, you’ll wonder how you ever made it any other way.
What Makes This Version Stand Out
- Flavor: The blend of sweet, spicy, and tangy notes creates a complex profile that’s more than a simple snack.
- Texture: The yogurt glaze locks in moisture, producing a crisp exterior with a tender interior that’s almost buttery.
- Ingredient Quality: Using Fuji or Honeycrisp apples ensures natural sweetness and a firm bite that holds up during baking.
- Ease: The method requires no special equipment, just a sheet pan and a few basic pantry items.
- Crowd Appeal: These chips are a hit at parties, family gatherings, or as a quick office snack.
- Make‑Ahead Potential: Store them in an airtight container and they stay crisp for up to a week.
- Visual Appeal: The golden edges and glossy glaze make for Instagram‑worthy food shots.
- Health Angle: With Greek yogurt and nuts, you get protein and healthy fats, turning a guilty pleasure into a balanced bite.
Inside the Ingredient List
The Flavor Base
Fuji or Honeycrisp apples are the foundation of this recipe, chosen for their natural sweetness and firm texture. Their crispness ensures the chips hold up during baking, preventing them from turning mushy. If you skip apples, you lose the core flavor and the textural contrast that makes the snack satisfying. For a sweeter version, you can use Gala apples, but the bite will be slightly softer. Selecting apples that are firm and free of bruises will give you the best results.
The Texture Crew
Greek yogurt serves as the binding agent, adding creaminess and a subtle tang that balances the sweetness. It also helps the glaze adhere to the apple slices, creating a glossy finish. If you’re lactose intolerant, substitute with coconut yogurt or a dairy‑free yogurt that has a similar thickness. The nuts add a crunchy contrast; walnuts, pecans, or almonds all work well, but almonds give a lighter bite. Be sure to chop them finely so they distribute evenly.
The Unexpected Star
Honey or maple syrup is the sweetener that gives the glaze its caramelized sheen. It also contributes to the Maillard reaction during baking, deepening the flavor. If you prefer a lower‑sugar option, try a splash of agave nectar or a drizzle of stevia‑sweetened syrup. The lemon juice is the bright, acidic counterpoint that cuts through the sweetness, preventing the glaze from becoming cloying. A few drops of lemon juice also help preserve the apple’s natural color.
The Final Flourish
Ground cinnamon is the aromatic spice that ties all the flavors together, providing warmth and depth. A pinch of nutmeg or a dash of cloves can add a subtle complexity if you’re feeling adventurous. The sugar, though small in quantity, caramelizes during baking, giving the chips a crisp, golden edge. If you’re watching calories, reduce the sugar by a quarter cup, but note that the glaze will be less caramelized.
Everything's prepped? Good. Let's get into the real action...
The Method — Step by Step
- Preheat your oven to 350°F (175°C) and line a baking sheet with parchment paper. The parchment prevents sticking and makes cleanup a breeze. While the oven warms, wash and dry the apples thoroughly. Slice them into 1/8‑inch thick rounds using a mandoline for uniformity; this ensures even baking. The thinner the slices, the crisper they’ll become.
- In a small bowl, whisk together Greek yogurt, honey (or maple syrup), lemon juice, and ground cinnamon until smooth. The consistency should be pourable but thick enough to coat the apples. Taste the glaze; it should be sweet with a hint of spice. If it’s too thick, add a tablespoon of water to thin it slightly. This glaze will give the chips their signature shine.
- Place the apple slices in a single layer on the prepared sheet. Ensure they don’t overlap; this allows each slice to crisp evenly. Lightly drizzle the glaze over the apples, making sure every slice gets a generous coating. The glaze should cling to the surface, forming a glossy film.
- Sprinkle chopped nuts over the glazed apples. The nuts should be evenly distributed to avoid clumps. They add a nutty crunch that balances the softness of the apple. If you’re using almonds, a quick toast in a dry skillet will bring out their flavor.
- Bake for 20–25 minutes, flipping the chips halfway through. The first 10 minutes should produce a golden edge; the second half will firm up the interior. Keep an eye on the color; you’re looking for a caramelized finish, not burnt. The flipping ensures even crispness on both sides.
- Remove the sheet from the oven and let the chips cool on the pan for 5 minutes. They’ll continue to crisp as they cool. The residual heat will set the glaze, creating a glossy coating that’s perfect for serving. If you’re in a hurry, transfer them to a wire rack to cool faster.
- Store any leftovers in an airtight container at room temperature. The chips should stay crisp for up to a week. If they start to lose crunch, add a splash of water to the container before reheating; the steam will revive their texture.
- Enjoy! Serve them warm or at room temperature. They’re perfect for a quick snack, a party treat, or a dessert that satisfies your sweet tooth without the guilt.
That's it — you did it. But hold on, I've got a few more tricks that'll take this to another level. The next section will give you insider knowledge that will elevate your chip game from good to legendary.
Insider Tricks for Flawless Results
The Temperature Rule Nobody Follows
Many bakers set their ovens to 375°F, but the sweet‑spicy glaze reacts best at a lower 350°F. The lower temperature allows the sugars to caramelize slowly without burning the apples. I’ve found that a preheated oven at this temperature gives a golden finish while keeping the interior tender. If your oven runs hot, set it a degree or two lower.
Why Your Nose Knows Best
When the first few minutes of baking are up, the air will be filled with the scent of caramelized sugar and cinnamon. Trust that aroma; it signals that the glaze is developing the right depth of flavor. If you open the oven too early, you’ll miss that sweet, buttery moment. The scent is the ultimate indicator that the chips are ready to be removed.
The 5-Minute Rest That Changes Everything
Letting the chips rest on the pan for five minutes after baking allows the glaze to set, creating a glossy finish that’s hard to resist. During this rest, the residual heat continues to cook the apple slightly, ensuring the interior stays tender. Skipping this step can result in a soggy finish that clings to the parchment. I’ve seen even the most seasoned bakers forget this crucial rest, so make it a habit.
The Crunch Factor
If you prefer an extra crunch, sprinkle a pinch of sea salt on top of the glaze before baking. The salt balances the sweetness and enhances the overall flavor profile. It also adds a subtle, savory bite that makes the snack more complex. Don’t overdo it; a light dusting is all you need.
The Sweetness Scale
The amount of honey or maple syrup can be adjusted to suit your taste. For a sweeter version, double the honey; for a more balanced flavor, reduce it by half. Keep in mind that increasing the sweetener will also increase the caramelization, so monitor the chips closely to avoid burning.
The Final Touch
Before serving, drizzle a light coat of honey over the cooled chips. This adds a final sheen and a touch of extra sweetness. The honey should be warm enough to coat the chips without melting them. This step is optional but recommended for those who love a glossy, caramelized finish.
Creative Twists and Variations
This recipe is a playground. Here are some of my favorite ways to switch things up:
Spicy Chili Apple Chips
Add a pinch of cayenne pepper to the glaze for a fiery kick. The heat pairs beautifully with the cinnamon, creating a sweet‑spicy contrast that’s perfect for game‑day snacks. This version is great for those who like a little heat in their treats.
Maple Walnut Crunch
Swap honey for pure maple syrup and use walnuts instead of almonds. The earthy walnut flavor complements the maple’s sweetness, creating a richer, deeper taste. This variation is ideal for autumn gatherings.
Chocolate Drizzle Delight
After baking, drizzle melted dark chocolate over the chips. The chocolate coats the crispy apples, adding a decadent layer that melts in your mouth. Pair with a sprinkle of sea salt for a sweet‑savory experience.
Coconut Yogurt Version
Replace Greek yogurt with coconut yogurt for a tropical twist. The coconut adds a subtle sweetness that pairs well with the apple’s natural flavor. This version is dairy‑free and still retains the crunchy texture.
Apple & Peanut Butter Dip
Serve the chips with a side of peanut butter dip for a protein boost. The creamy peanut butter contrasts with the crisp apples, creating a satisfying combination of textures. This is a great option for a post‑workout snack.
Herbal Infusion
Add a splash of fresh rosemary or thyme to the glaze for an herbaceous note. The herbs pair surprisingly well with the apple’s sweetness, adding depth and complexity. This version is perfect for a sophisticated snack platter.
Storing and Bringing It Back to Life
Fridge Storage
Place the cooled chips in an airtight container at room temperature. They’ll stay crisp for up to seven days. Avoid stacking the chips; use parchment paper between layers to keep them from sticking. If you notice they’re losing crunch, add a paper towel to absorb excess moisture.
Freezer Friendly
Freeze the chips in a single layer on a baking sheet before transferring them to a freezer bag. They can be stored for up to three months. When ready to eat, let them thaw at room temperature for 10 minutes; they’ll retain their crispness.
Best Reheating Method
To revive crispness, preheat a skillet over medium heat and toast the chips for 1–2 minutes on each side. Alternatively, bake them in a 300°F oven for 5 minutes. Adding a tiny splash of water to the container before reheating steams the chips back to perfection. This trick keeps them from becoming soggy.