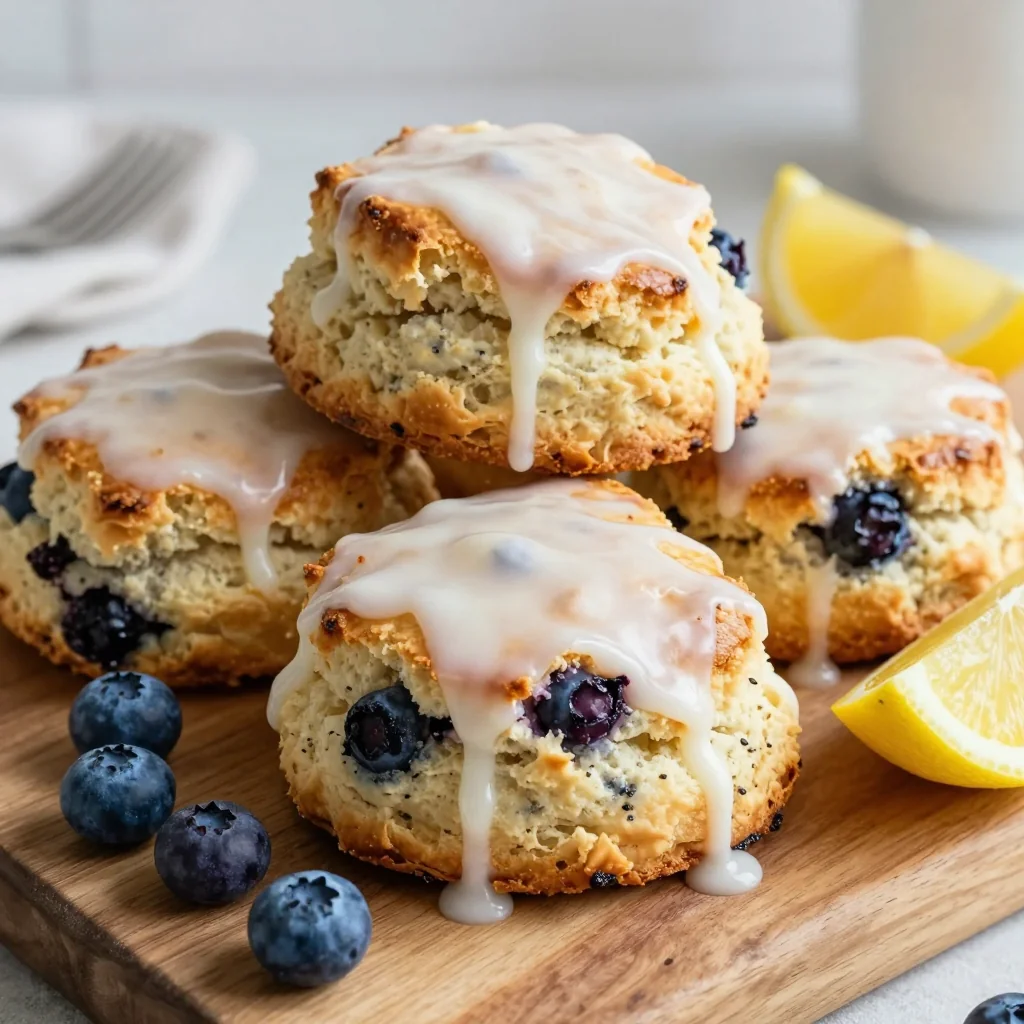
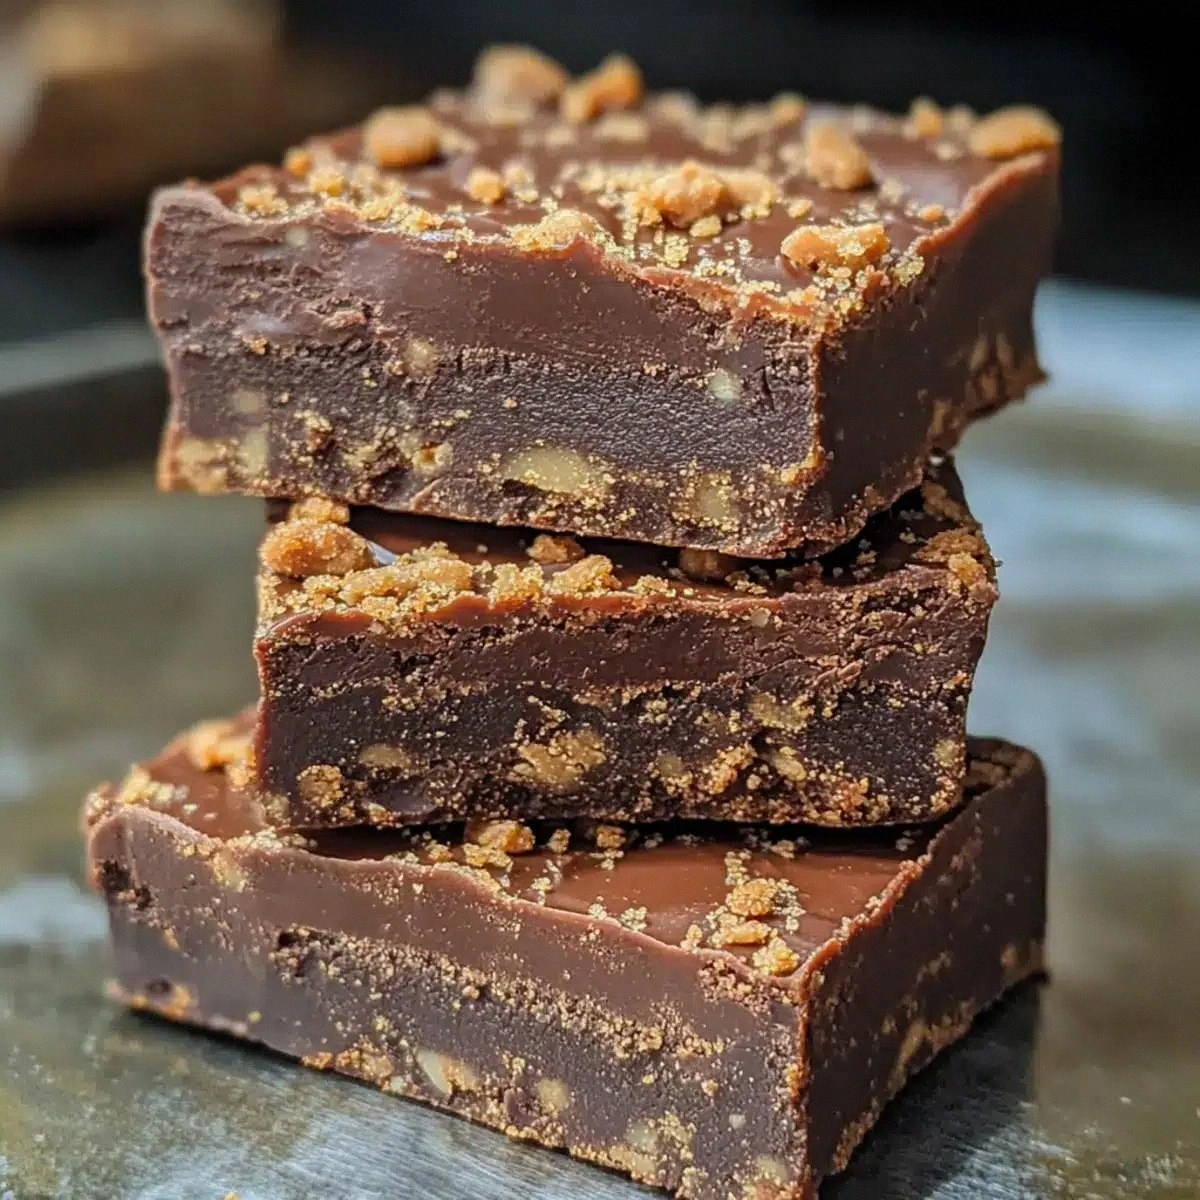
Picture this: I’m in the middle of a midnight snack frenzy, the fridge is a battlefield of leftovers, and I’m about to launch the ultimate peanut butter chocolate bar that will make everyone in my house beg for a second bite. I had a kitchen disaster last week when a batch of homemade chocolate truffles turned into a sticky, soggy mess that looked more like a peanut butter puddle than a treat. That night, I stared at the mess, feeling the frustration of a failed experiment and the sweet longing for something that would satisfy both my sweet tooth and my love for peanut butter. I dared myself to experiment, and what emerged was a flourless, no-bake peanut butter chocolate bar that turned my kitchen into a fragrant, buttery paradise. Let me walk you through every single step — by the end, you’ll wonder how you ever made it any other way.
The first time I tasted these bars, the moment the chocolate melted over the creamy peanut butter, the flavors exploded like fireworks in my mouth. The aroma was a comforting blend of toasted peanut butter and warm chocolate, which instantly transported me back to childhood afternoons spent with a bowl of peanut butter and honey. I could feel the smooth texture against my teeth, the subtle crunch of chocolate chips, and the gentle snap of the coconut oil’s melted edge. That sensory snapshot was the spark that turned a simple craving into a culinary obsession. I was hooked, and I knew I had to share this recipe before it slipped into the abyss of forgotten kitchen experiments.
What sets this version apart from the countless peanut butter chocolate recipes on the internet is its pure, unadulterated flavor profile. I kept the ingredient list minimal, focusing on the quality of each component, which makes the final product taste like a gourmet dessert with every bite. The absence of flour eliminates the heaviness that often plagues homemade bars, allowing the peanut butter and chocolate to shine in their natural glory. I added a splash of vanilla extract and a pinch of baking soda to lift the flavors without overpowering them, creating a subtle lift that feels almost airy. This recipe is a testament to the idea that sometimes, the simplest ingredients, when handled with care, produce the most unforgettable results.
I dare you to taste this and not go back for seconds. The first bite is a silky, chocolatey explosion that clings to your palate like a velvet blanket. The second bite reveals a hint of honey or maple syrup that brightens the richness, and the final bite leaves you craving the next one. Most recipes get this completely wrong by overcomplicating the process or using too much sugar, but here, each element is measured to perfection. The result is a bar that feels indulgent yet surprisingly light, a perfect treat for any time of day. Picture yourself pulling this out of the fridge, the whole kitchen smelling incredible, and sharing it with friends who will instantly be convinced this is hands down the best version you'll ever make at home.
What Makes This Version Stand Out
- Taste: The combination of creamy peanut butter and semi-sweet chocolate creates a harmonious balance where neither flavor overpowers the other. The subtle sweetness from honey or maple syrup adds a natural lift, while vanilla extract brings a warm, aromatic undertone that elevates the entire experience. The result is a chocolate bar that is both rich and refreshing, a perfect counterpoint to the intense peanut butter base.
- Texture: The bars achieve a silky, melt-in-your-mouth consistency that feels luxurious on the tongue. The coconut oil acts as a binder, giving the bars a firm yet tender structure that holds together without becoming brittle. The chocolate chips add a delightful crunch that punctuates each bite, preventing the bars from becoming too smooth.
- Simultaneous Simplicity: No baking, no measuring cups, no complex steps—just whisk, melt, and chill. The recipe is designed for those who want a quick, fuss-free dessert that still feels like a gourmet indulgence. The single-ingredient pantry staples make this a go-to recipe for spontaneous cravings.
- Uniqueness: The use of baking soda as a subtle leavening agent gives the bars a slightly airy texture that sets them apart from dense, fudgy alternatives. The coconut oil adds a tropical hint that complements the peanut butter’s earthy notes, creating a flavor profile that feels fresh and unexpected.
- Crowd Reaction: When I first served these bars at a gathering, guests were amazed at how the chocolate didn’t overpower the peanut butter. They praised the bars for being “light” yet “full of flavor,” a rare combination that keeps them coming back for more. The bars’ easy-to-serve size makes them ideal for parties, potlucks, or a simple snack.
- Ingredient Quality: Using a creamy, high‑protein peanut butter ensures a rich, buttery mouthfeel, while the semi-sweet chocolate chips provide a balanced cocoa bite. The honey or maple syrup adds natural sweetness that complements the nutty undertones, and coconut oil provides a silky finish that enhances the overall texture.
- Make‑ahead Potential: These bars freeze well, making them a convenient snack for busy days. Because they are not baked, they can be prepared in advance and stored in an airtight container, ready to satisfy a sudden craving or to be gifted to friends.
Inside the Ingredient List
The Flavor Base
1 cup Creamy Peanut Butter: This is the heart of the bar. A high‑protein, creamy peanut butter gives a rich, buttery foundation that coats the palate like velvet. If you opt for a natural peanut butter with minimal additives, the flavor will be more pronounced and the texture smoother. Skipping this step would leave you with a flat, unremarkable base that cannot carry the chocolate’s depth.
1/2 cup Honey or Maple Syrup: The natural sweetener balances the saltiness of the peanut butter and the bitterness of the chocolate. Honey provides floral undertones, while maple syrup offers a subtle caramel note. If you prefer a sweeter bar, increase the amount by a tablespoon, but be careful not to drown the nutty flavor. If you skip this, the bars will taste overwhelmingly nutty and dry.
1 large Egg: The egg acts as a binder, ensuring the mixture holds together without the need for flour. It also contributes a slight richness that enhances the overall mouthfeel. If you’re vegan or allergic, you can substitute with a flaxseed egg or a mashed banana, but the texture will shift slightly toward a denser consistency.
The Texture Crew
1 tsp Vanilla Extract: Vanilla is the quiet hero that rounds off the flavors, adding a subtle warmth that feels like a comforting hug. A high‑quality vanilla extract will deliver a more pronounced aroma compared to the cheaper versions. If you skip vanilla, the bars will still be good but will lack that aromatic depth that makes the experience memorable.
1/2 tsp Baking Soda: This tiny amount of baking soda works as a leavening agent, creating a slightly airy texture that lifts the bars. It also helps neutralize any acidity from the honey or maple syrup, allowing the chocolate’s flavor to shine. Without it, the bars might become too dense and heavy, making them feel like a chocolate cookie rather than a light bar.
The Unexpected Star
1 cup Semi‑Sweet Chocolate Chips: The chocolate chips are the star that provides the sweet, bitter contrast essential to chocolate lovers. Choosing high‑cocoa, semi‑sweet chips gives a balanced bite that doesn’t overpower the peanut butter. If you prefer a sweeter bar, consider adding a few dark chocolate chips for a richer bite, but keep the ratio in check to avoid a bitter finish.
The Final Flourish
1 tbsp Coconut Oil: Coconut oil adds a silky finish and a subtle tropical note that elevates the flavor profile. It also helps the bars set more firmly, giving them a firm yet tender bite. If you’re avoiding coconut, you can use a neutral oil like grapeseed or a small amount of butter, but the flavor profile will shift accordingly.
Everything's prepped? Good. Let’s get into the real action…
The Method — Step by Step
- Begin by placing the semi‑sweet chocolate chips in a heat‑proof bowl. Set the bowl over a pot of simmering water, ensuring the bottom of the bowl does not touch the water. Stir occasionally until the chocolate is completely melted and glossy. This gentle melt preserves the chocolate’s flavor and prevents scorching. Watch out: If the water boils too hard, it can splash and burn the chocolate. Keep the heat low and stir continuously.
- While the chocolate melts, whisk the creamy peanut butter, honey or maple syrup, egg, vanilla extract, and baking soda together in a separate bowl until the mixture is smooth and uniform. The egg will help bind the ingredients, giving the bars a firm structure once set. If you’re vegan, replace the egg with a flaxseed egg to maintain binding properties. Kitchen Hack: Use a small whisk or a fork to avoid over‑whisking, which can incorporate too much air and cause the bars to rise slightly.
- Once the chocolate is melted, pour it into the peanut butter mixture. Stir gently until the chocolate is fully incorporated, creating a silky, glossy batter. The chocolate should coat the peanut butter like a velvet blanket, giving the mixture a deep, rich hue. Check the consistency; it should be thick enough to hold its shape when spooned.
- Add the tablespoon of coconut oil to the mixture and stir until fully blended. The coconut oil will give the bars a slightly tropical aroma and help them set with a firm yet tender bite. If the mixture feels too thick, add a teaspoon of warm water to achieve the desired consistency.
- Line an 8-inch square baking dish with parchment paper, leaving an overhang on two sides for easy removal. Spoon the batter into the dish, spreading it evenly with a spatula. The surface should be flat and level; this ensures uniform bars once set.
- Place the dish in the refrigerator and chill for at least 3 hours, or until the bars are firm to the touch. The chilling time allows the coconut oil to solidify, giving the bars a crisp edge that shatters like thin ice when bitten. If you’re in a hurry, you can use a cooler or an ice bath to speed up the process.
- Once the bars are set, lift them out using the parchment overhang. Place them on a cutting board and cut into 12 equal squares or bars, using a sharp knife for clean edges. If you prefer larger bars, cut into 8 pieces instead.
- Store the bars in an airtight container in the refrigerator for up to a week, or freeze them for up to 3 months. When ready to eat, let the bars sit at room temperature for a few minutes to soften slightly, enhancing the melt-in-your-mouth experience. Kitchen Hack: If the bars become too hard after freezing, let them thaw at room temperature for 10–15 minutes before serving.
- For an extra touch, drizzle a thin line of melted dark chocolate over the top of each bar before chilling. This adds a glossy finish and a slight bitterness that contrasts beautifully with the sweet peanut butter base. The chocolate drizzle also creates a subtle visual cue that elevates the bars from simple snacks to elegant desserts.
That’s it — you did it. But hold on, I’ve got a few more tricks that will take this to another level, ensuring each bite is a masterpiece.
Insider Tricks for Flawless Results
The Temperature Rule Nobody Follows
Chocolate can be temperamental; it’s all about the temperature. When melting the chocolate, keep the water at a gentle simmer, not a rolling boil. A higher temperature can cause the cocoa butter to separate, leaving a dull, streaky finish. Keep the bowl moving and check the temperature with a thermometer; aim for 45–50°C (113–122°F). This small tweak guarantees a glossy, smooth surface that feels luxurious.
Why Your Nose Knows Best
Before you even taste the bars, take a deep sniff. If the aroma is warm, nutty, and slightly floral, you’re on the right track. A faint, burnt smell indicates over‑cooking, while a dull scent signals that the peanut butter or chocolate may have gone stale. Trust your nose; it’s a reliable guide to flavor integrity.
The 5‑Minute Rest That Changes Everything
After you remove the bars from the refrigerator, let them rest at room temperature for exactly five minutes before cutting. This brief pause allows the coconut oil to soften just enough to give the bars a gentle snap rather than a brittle crunch. If you cut them immediately, the bars may crumble, losing that coveted smooth bite.
Keep It Cool, Keep It Fresh
Storing these bars in an airtight container is essential to preserve their freshness. Avoid exposing them to direct sunlight or high humidity, as this can cause the chocolate to bloom, leaving unsightly white streaks. If you live in a humid climate, consider placing a small silica gel packet in the container to absorb excess moisture.
Use the Right Knife
A sharp, serrated knife cuts the bars cleanly, preventing them from tearing or breaking. A dull knife can compress the bars, causing them to lose their shape and texture. Keep the knife clean and sharp; it’s a small investment that pays off in presentation and bite.
Don’t Forget the Parchment Overhang
The parchment overhang is a lifesaver. It allows you to lift the entire slab without disturbing the bars, ensuring clean edges. Without this trick, you risk crushing the bars or leaving uneven surfaces that can ruin the aesthetic appeal.
Creative Twists and Variations
This recipe is a playground. Here are some of my favorite ways to switch things up:
Nutty Explosion
Add chopped toasted almonds or cashews to the batter for an extra crunch. The nuts bring a nutty aroma that pairs beautifully with the chocolate, creating a multi‑textured bite. Use 1/4 cup of nuts, and stir them in just before pouring the mixture into the dish.
Spiced Delight
Incorporate a pinch of ground cinnamon or a dash of cayenne pepper into the batter. The cinnamon adds warmth, while the cayenne gives a subtle heat that contrasts with the sweetness. These spices elevate the flavor profile, making the bars a perfect fall treat.
Berry Bliss
Fold in 1/2 cup of dried cranberries or raisins for a burst of fruity sweetness. The berries add a chewy texture that complements the silky chocolate. They also provide a pop of color, making the bars visually appealing.
Chocolate‑Covered Marvel
After the bars have set, drizzle melted dark chocolate over the top. The dark chocolate’s bitterness balances the sweetness, creating a sophisticated flavor profile. Finish with a light dusting of sea salt for an extra layer of complexity.
Vegan Variant
Replace the egg with 1 tablespoon of ground flaxseed mixed with 3 tablespoons of water, letting it sit for 5 minutes until gelatinous. Use a plant‑based peanut butter and coconut milk instead of dairy. This version maintains the same texture and flavor while keeping it vegan.
Salted Caramel Twist
Swirl in a handful of caramel bits and sprinkle sea salt on top before chilling. The caramel adds a buttery sweetness, and the sea salt enhances the overall flavor, creating a luxurious dessert.
Storing and Bringing It Back to Life
Fridge Storage
Place the bars in an airtight container and store them in the refrigerator for up to 7 days. The cool environment keeps the coconut oil firm, ensuring the bars retain their crisp edges. If you notice any moisture build‑up, replace the container with a fresh one to avoid sogginess.
Freezer Friendly
For longer storage, wrap each bar individually in plastic wrap and place them in a freezer bag. Freeze for up to 3 months. When ready to enjoy, let the bars thaw at room temperature for 10 minutes to regain their melt‑in‑your‑mouth texture. Avoid refreezing once thawed to preserve quality.
Best Reheating Method
To revive a frozen bar, gently warm it in a microwave on low power for 10–15 seconds. If the bar feels too hard, add a splash of warm water to the container before microwaving; the steam will restore its silky texture. Let the bar rest for a minute before eating to allow the flavors to settle.